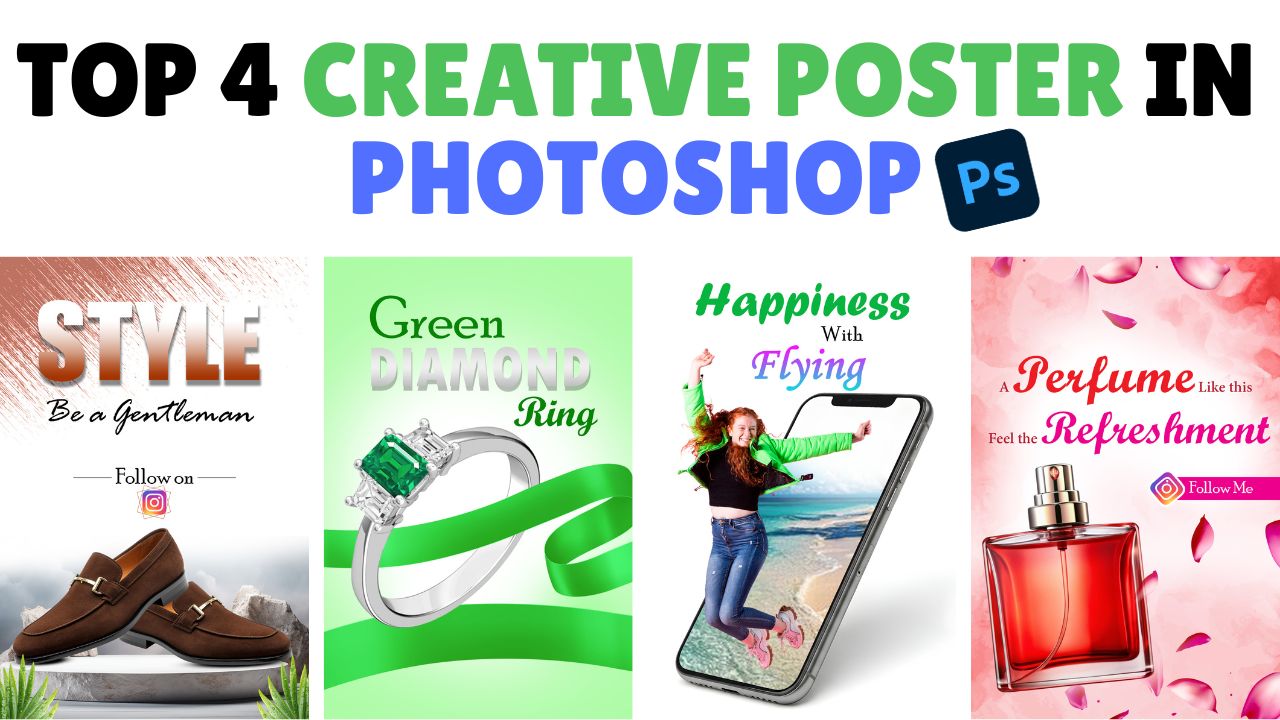
Today, we will learn how to create four creative poster designs in Photoshop. These are four creative poster designs that you can easily create using the software. While these designs require a touch of creativity, they are suitable for use in advertisements anywhere. These are compact, mini-style posters.
Although you could create these posters using other software, Photoshop offers a wide range of editing tools and customization options, allowing you to design them in a truly professional manner. So, let’s learn how to create these four creative poster designs in Photoshop. You can create them in any version of Photoshop, though using newer versions—such as 2020, 2021, 2022, or the latest release—is recommended.
We will learn four different methods to create these posters. You can watch the video tutorials for these designs by clicking the links provided below.
Number (1): Ring Poster
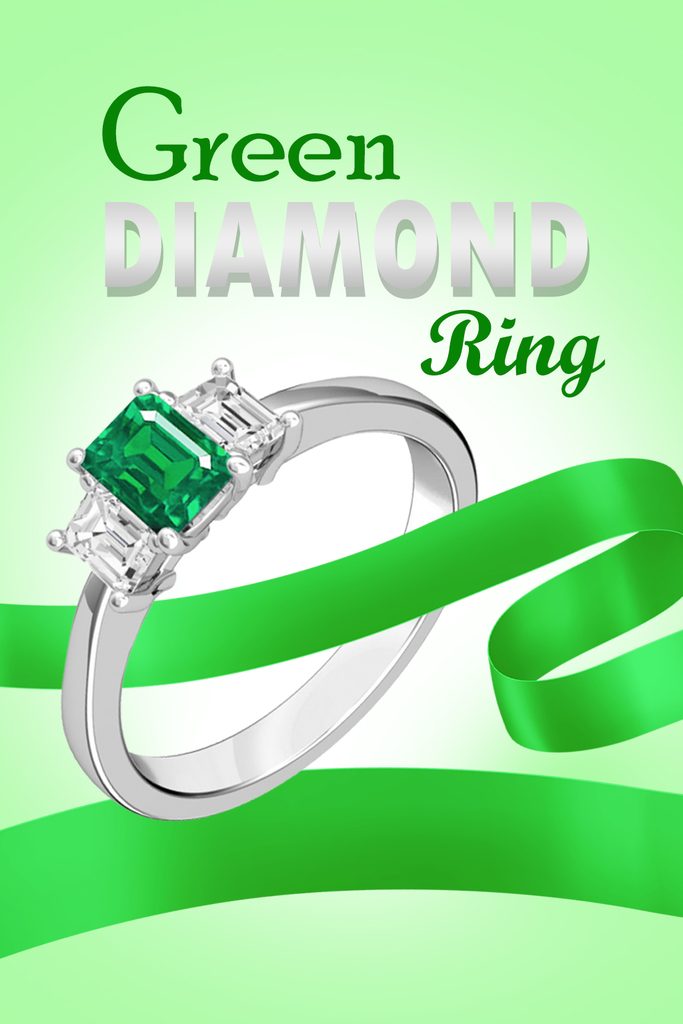
To create the Ring Poster, first download images of a ring and a ribbon from the internet. Open Photoshop and create a new document (Ctrl+N) sized for a poster. Select the Rectangle Tool from the toolbar on the left, place it on the canvas, and fill it with a color. Next, go to the ‘File’ menu at the top and select ‘Open’ (or use Ctrl+O) to import the ring image.
Then, use the ‘Open’ option again to import the ribbon image. Position the ribbon image relative to the ring image against the background. Finally, select the Text Tool from the toolbar on the right and add the heading for the Ring Poster.
Number (2): Perfume Poster
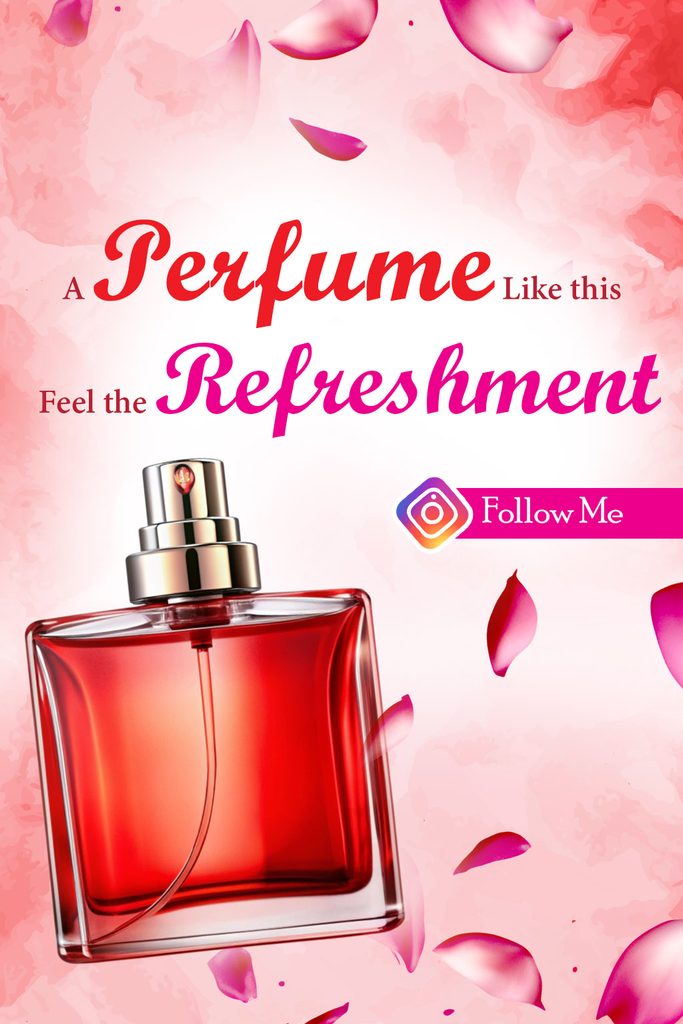
To create the Perfume Poster, first download images of a perfume bottle, a red texture, rose petals (PNG format), and the Instagram logo from the internet. Create a new document (Ctrl+N) sized for a poster. Go to the ‘File’ option in the top menu bar, click ‘Open’, and select a red-colored texture image. Position it properly as the background.
Go to the ‘Open’ option in the top menu bar, select a perfume image, rotate it, and place it on the left side. Again, use the ‘Open’ option to select a rose petal PNG image and position it over the background. Select the ‘Text’ tool from the left-hand toolbar to write a heading for the perfume poster, and finally, use the ‘Open’ option to select an Instagram icon and place it on the right side.
Number (3):- Shoes Poster
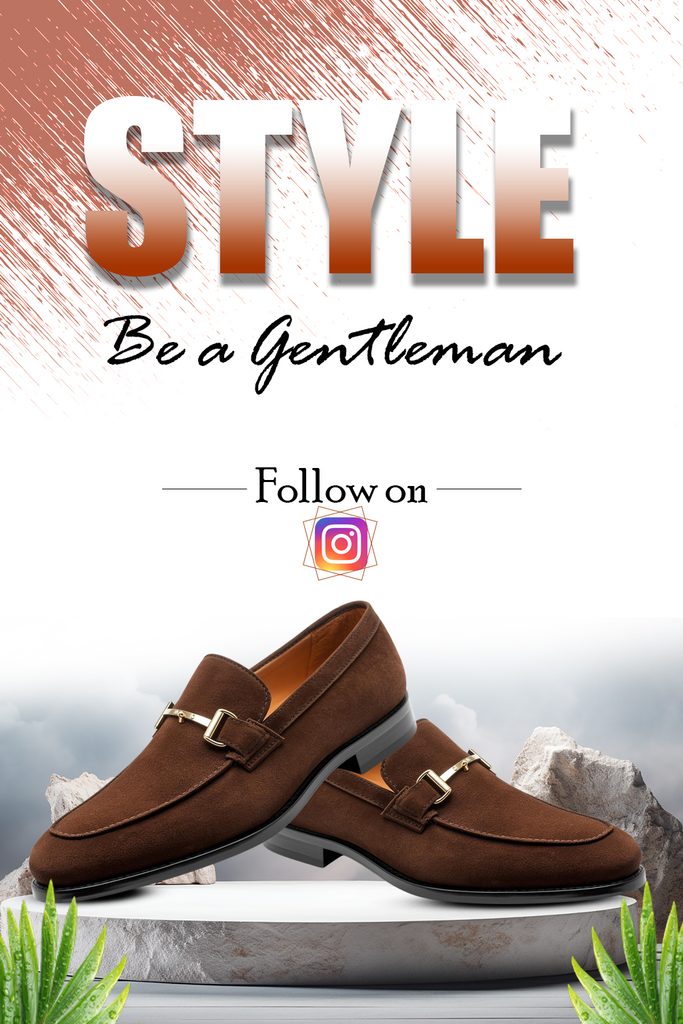
To create the shoes poster, download a texture image, a stone stand image, a shoe image, a leaf PNG image, and an Instagram icon image from the internet. Press Ctrl+N to create a new page sized for the poster. Go to the ‘File’ menu, select ‘Open’, and choose the texture image. Position it at the top of the background.
Go to the ‘Open’ option in the top menu bar, select the stone stand image, and place it at the bottom. Next, select the shoe image and place it on top of the stone stand image. Use the ‘Open’ option to select the leaf PNG image and place it on both the left and right sides of the stone stand. Finally, use the ‘Text’ tool to write a heading and place the Instagram icon beneath it.
Number (4):- Flying Happiness Poster
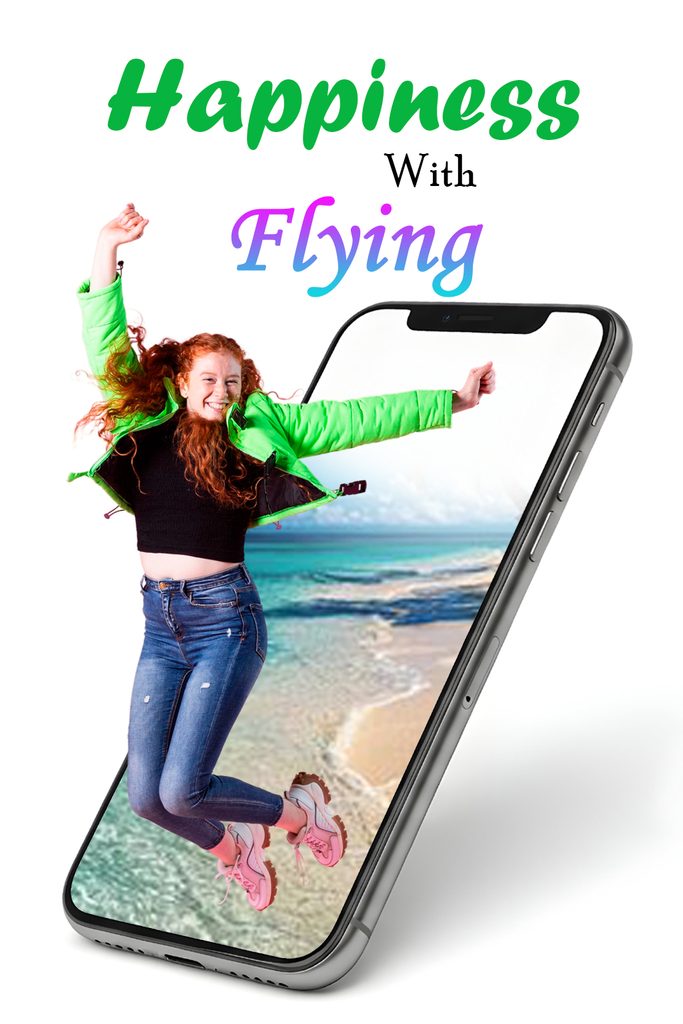
To create the ‘Flying Happiness’ poster, download a mobile phone image, a flying girl image, and a beach scene image from the internet. Press Ctrl+N to create a new page sized for the poster. Go to the ‘File’ menu, select ‘Open’, and choose the mobile phone image. Position it in the center of the background. Then, using the ‘Magic Wand Tool’ from the left toolbar, create a selection layer matching the size of the mobile phone’s display.
Use the ‘Open’ option to select the beach texture image; then, right-click on the mobile display layer and select ‘Create Clipping Mask’. Finally, select the image of the girl and position it over the mobile display layer so that she appears to be flying out of the beach scene displayed on the mobile screen. Select the ‘Text’ option from the left side and write the heading for it.
In Hindi:-
आज हम सीखेंगे कि Photoshop में चार क्रिएटिव पोस्टर डिज़ाइन कैसे बनाए जाएं। ये चार क्रिएटिव पोस्टर डिज़ाइन हैं जिन्हें आप इस सॉफ़्टवेयर का इस्तेमाल करके आसानी से बना सकते हैं। हालाँकि इन डिज़ाइनों के लिए थोड़ी क्रिएटिविटी की ज़रूरत होती है, लेकिन ये कहीं भी विज्ञापनों में इस्तेमाल के लिए उपयुक्त हैं। ये कॉम्पैक्ट, मिनी-स्टाइल पोस्टर हैं।
हालाँकि आप दूसरे सॉफ़्टवेयर का इस्तेमाल करके भी ये पोस्टर बना सकते हैं, लेकिन Photoshop में एडिटिंग टूल्स और कस्टमाइज़ेशन के कई विकल्प मिलते हैं, जिससे आप उन्हें सचमुच प्रोफेशनल तरीके से डिज़ाइन कर सकते हैं। तो आइए, Photoshop में ये चार क्रिएटिव पोस्टर डिज़ाइन बनाना सीखते हैं। आप इन्हें Photoshop के किसी भी वर्शन में बना सकते हैं, हालाँकि नए वर्शन—जैसे 2020, 2021, 2022 या लेटेस्ट रिलीज़—का इस्तेमाल करने की सलाह दी जाती है।
हम इन पोस्टरों को बनाने के चार अलग-अलग तरीके सीखेंगे। आप नीचे दिए गए लिंक पर क्लिक करके इन डिज़ाइनों के लिए वीडियो ट्यूटोरियल देख सकते हैं।
नंबर (1): रिंग पोस्टर
रिंग पोस्टर बनाने के लिए, सबसे पहले इंटरनेट से एक रिंग और एक रिबन की इमेज डाउनलोड करें। Photoshop खोलें और पोस्टर के साइज़ का एक नया डॉक्यूमेंट (Ctrl+N) बनाएँ। बाईं ओर टूलबार से Rectangle Tool चुनें, इसे कैनवस पर रखें और इसमें कोई रंग भरें। इसके बाद, ऊपर ‘File’ मेनू में जाएँ और रिंग इमेज को इम्पोर्ट करने के लिए ‘Open’ चुनें (या Ctrl+O का इस्तेमाल करें)।
फिर, रिबन इमेज को इम्पोर्ट करने के लिए फिर से ‘Open’ विकल्प का इस्तेमाल करें। बैकग्राउंड पर रिंग इमेज के हिसाब से रिबन इमेज को सेट करें। आखिर में, दाईं ओर टूलबार से Text Tool चुनें और रिंग पोस्टर के लिए हेडिंग जोड़ें।
नंबर (2): परफ्यूम पोस्टर
परफ्यूम पोस्टर बनाने के लिए, सबसे पहले इंटरनेट से परफ्यूम की बोतल, लाल टेक्सचर, गुलाब की पंखुड़ियों (PNG फ़ॉर्मैट) और Instagram लोगो की इमेज डाउनलोड करें। पोस्टर के साइज़ का एक नया डॉक्यूमेंट (Ctrl+N) बनाएँ। ऊपर मेनू बार में ‘File’ विकल्प पर जाएँ, ‘Open’ पर क्लिक करें और लाल रंग की टेक्सचर इमेज चुनें। इसे बैकग्राउंड के तौर पर सही ढंग से सेट करें।
ऊपर मेनू बार में ‘Open’ विकल्प पर जाएँ, परफ्यूम की इमेज चुनें, उसे घुमाएँ (rotate करें) और बाईं ओर रखें। फिर से, गुलाब की पंखुड़ी वाली PNG इमेज चुनने के लिए ‘Open’ विकल्प का इस्तेमाल करें और उसे बैकग्राउंड के ऊपर सेट करें। परफ्यूम पोस्टर के लिए हेडिंग लिखने के लिए बाईं ओर के टूलबार से ‘Text’ टूल चुनें, और आखिर में, Instagram आइकन चुनने और उसे दाईं ओर रखने के लिए ‘Open’ ऑप्शन का इस्तेमाल करें।
नंबर (3):- शूज़ पोस्टर
शूज़ पोस्टर बनाने के लिए, इंटरनेट से एक टेक्सचर इमेज, एक स्टोन स्टैंड इमेज, एक शू इमेज, एक लीफ़ PNG इमेज और एक Instagram आइकन इमेज डाउनलोड करें। पोस्टर के साइज़ का नया पेज बनाने के लिए Ctrl+N दबाएँ। ‘File’ मेनू में जाएँ, ‘Open’ चुनें और टेक्सचर इमेज चुनें। इसे बैकग्राउंड के ऊपर रखें।
ऊपरी मेनू बार में ‘Open’ ऑप्शन पर जाएँ, स्टोन स्टैंड इमेज चुनें और उसे नीचे रखें। इसके बाद, शू इमेज चुनें और उसे स्टोन स्टैंड इमेज के ऊपर रखें। लीफ़ PNG इमेज चुनने के लिए ‘Open’ ऑप्शन का इस्तेमाल करें और उसे स्टोन स्टैंड के बाईं और दाईं ओर रखें। आखिर में, हेडिंग लिखने के लिए ‘Text’ टूल का इस्तेमाल करें और उसके नीचे Instagram आइकन रखें।
नंबर (4):- फ्लाइंग हैप्पीनेस पोस्टर
‘फ्लाइंग हैप्पीनेस’ पोस्टर बनाने के लिए, इंटरनेट से एक मोबाइल फ़ोन इमेज, एक उड़ती हुई लड़की की इमेज और एक बीच सीन की इमेज डाउनलोड करें। पोस्टर के साइज़ का नया पेज बनाने के लिए Ctrl+N दबाएँ। ‘File’ मेनू में जाएँ, ‘Open’ चुनें और मोबाइल फ़ोन इमेज चुनें। इसे बैकग्राउंड के बीच में रखें। फिर, बाईं ओर के टूलबार से ‘Magic Wand Tool’ का इस्तेमाल करके, मोबाइल फ़ोन की डिस्प्ले के साइज़ के बराबर एक सिलेक्शन लेयर बनाएँ।
बीच टेक्सचर इमेज चुनने के लिए ‘Open’ ऑप्शन का इस्तेमाल करें; फिर, मोबाइल डिस्प्ले लेयर पर राइट-क्लिक करें और ‘Create Clipping Mask’ चुनें। आखिर में, लड़की की इमेज चुनें और उसे मोबाइल डिस्प्ले लेयर के ऊपर रखें ताकि वह मोबाइल स्क्रीन पर दिख रहे बीच सीन से बाहर उड़ती हुई लगे। बाईं ओर से ‘Text’ ऑप्शन चुनें और इसके लिए हेडिंग लिखें।
Video Tutorial:– https://youtu.be/o9wUfU3f9qE