
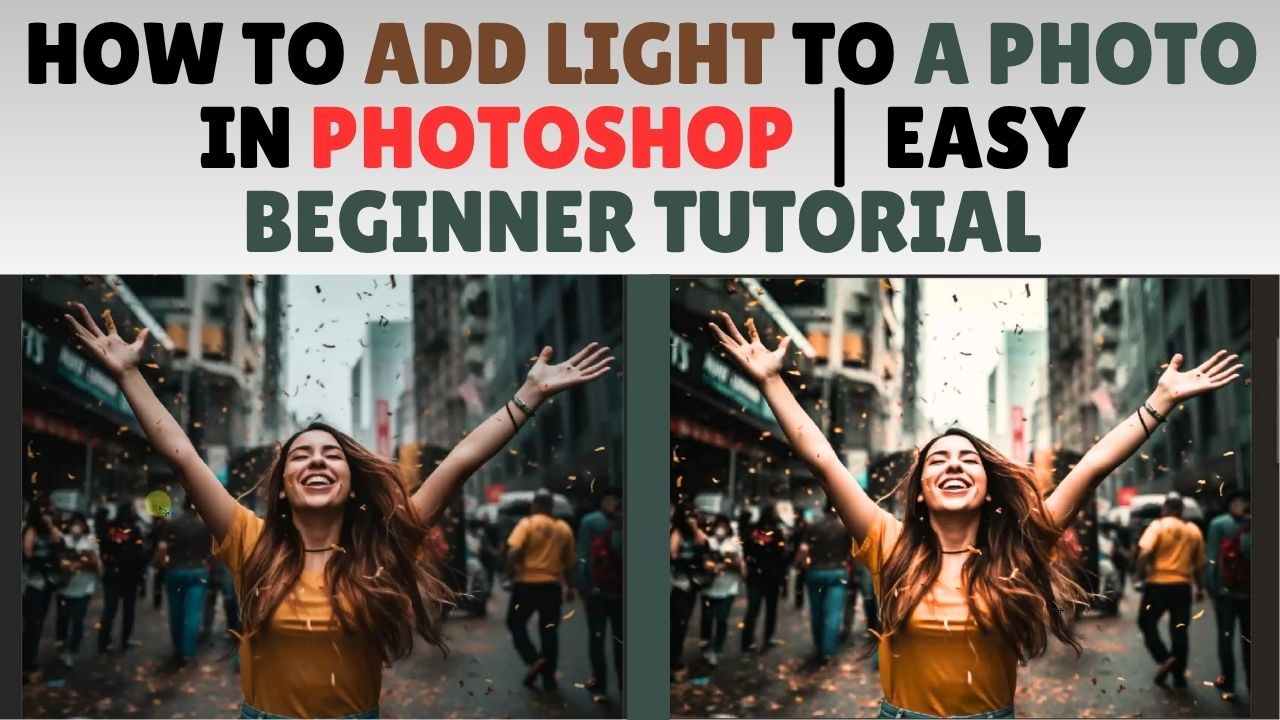
How to Add Light to a Photo in Photoshop | Easy Beginner Tutorial
Friends, in today’s blog, we will learn how to add light to photos in Photoshop—a guide designed for beginners. We will explore how to illuminate a person’s photo or an object—essentially bringing brightness and contrast to a dark image. We will utilize five specific Photoshop tools that allow us to add light even to the darkest images, making the subject or object appear bright. While it is possible to add light using other software or mobile applications, Photoshop offers the best results for lighting an image. So, let’s learn about these five Photoshop tools. These tools work exceptionally well in newer versions of Photoshop, such as 2019, 2020, 2021, 2022, 2023, or the latest release. Let’s go through the process in five steps.
We will cover this topic in five steps. After reading this blog, be sure to watch the video tutorial; you can find the link at the bottom of the page.
Number (1):- Camera Raw Filter
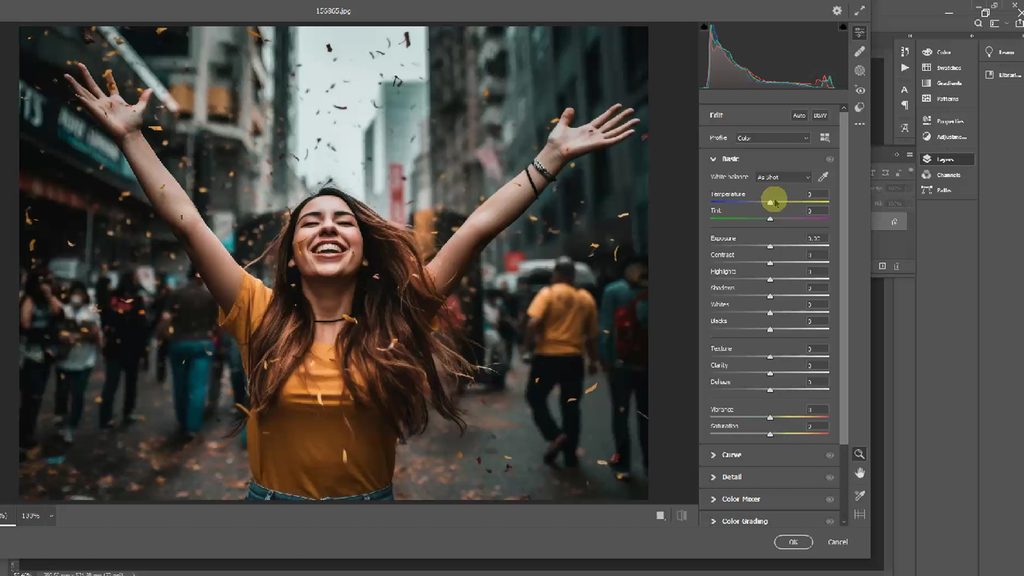
Open Photoshop, go to the ‘Filter’ option in the top menu bar, and select ‘Camera Raw Filter’ (or use the shortcut Ctrl+Shift+A) to open its settings. First, we will adjust the ‘Temperature’ and ‘Tint’ settings to add light to the image. Next, we will use the ‘Exposure’ option—arguably the most important setting in the Camera Raw Filter—to effectively brighten the image.
Following that, we can further adjust the lighting using the ‘Contrast’, ‘Highlights’, ‘Shadows’, ‘Whites’, and ‘Blacks’ options; these allow us to fine-tune the light and color balance. You can also utilize additional options such as ‘Texture’, ‘Clarity’, ‘Dehaze’, ‘Vibrance’, and ‘Saturation’ to enhance the image further. This feature provides the ‘Curves’ option, allowing you to adjust the lighting in any image; while Photoshop has a dedicated Curves tool, you can also use the ‘Color Mixer’ option here to adjust the lighting.
Number (2):- Birghtness and Contrast
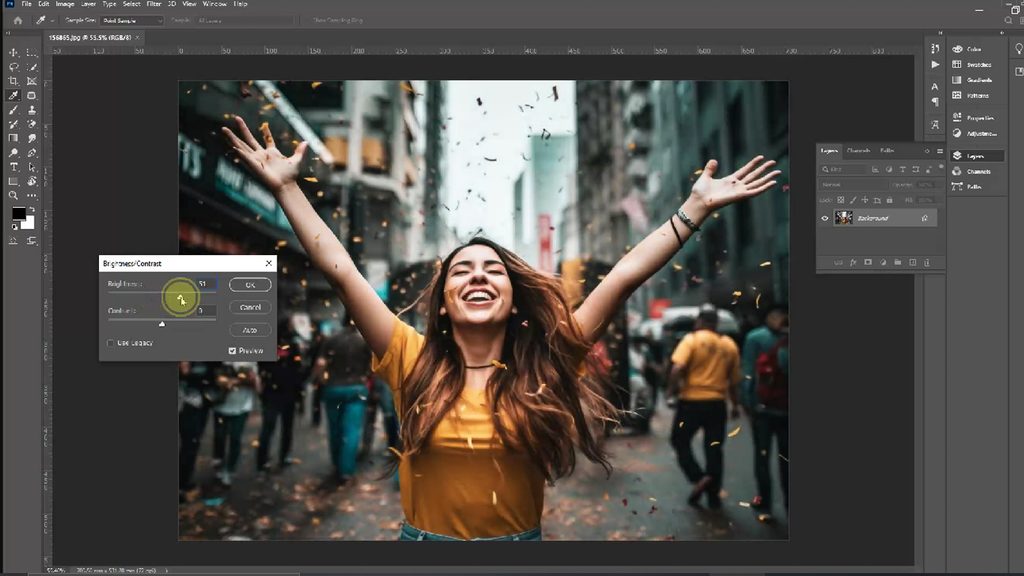
Click on the ‘Image’ option in the top menu bar, then click on ‘Adjustments’ and select ‘Brightness/Contrast’. You can then adjust the brightness and contrast of the image to your liking. In this option, you can adjust the lighting by moving the sliders (handles) back and forth. The keyboard shortcut for this is Alt+I+A+C.
Number (3):- Level
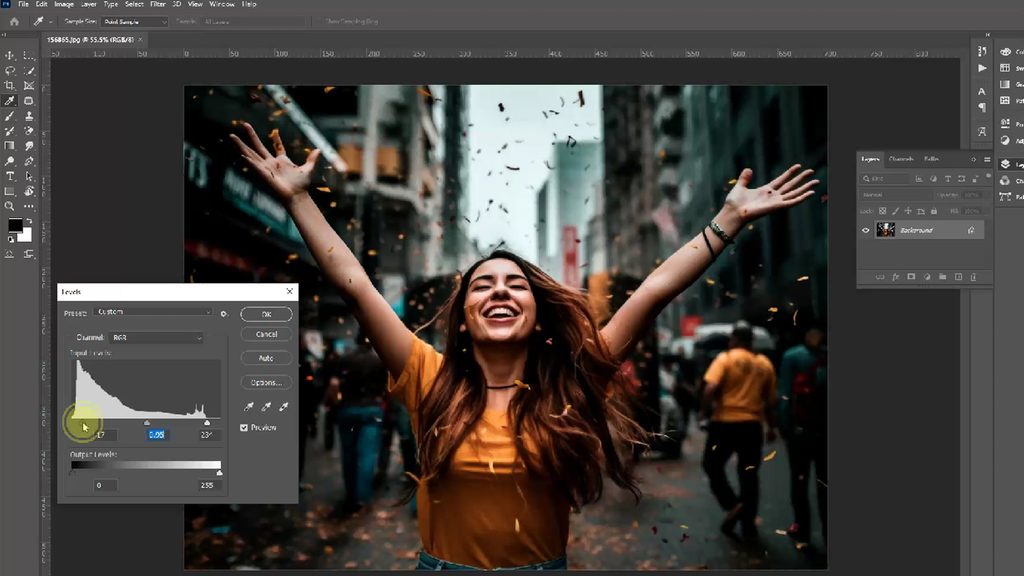
Click on the ‘Image’ option in the top menu bar, then click on ‘Adjustments’ and select ‘Levels’. You can then adjust the lighting of the image as desired. This option provides three sliders: one on the left, one on the right, and one in the middle. You can adjust the lighting by moving these sliders; there are also two additional sliders at the bottom. The keyboard shortcut for this is Ctrl+L.
Number (4):- Curve
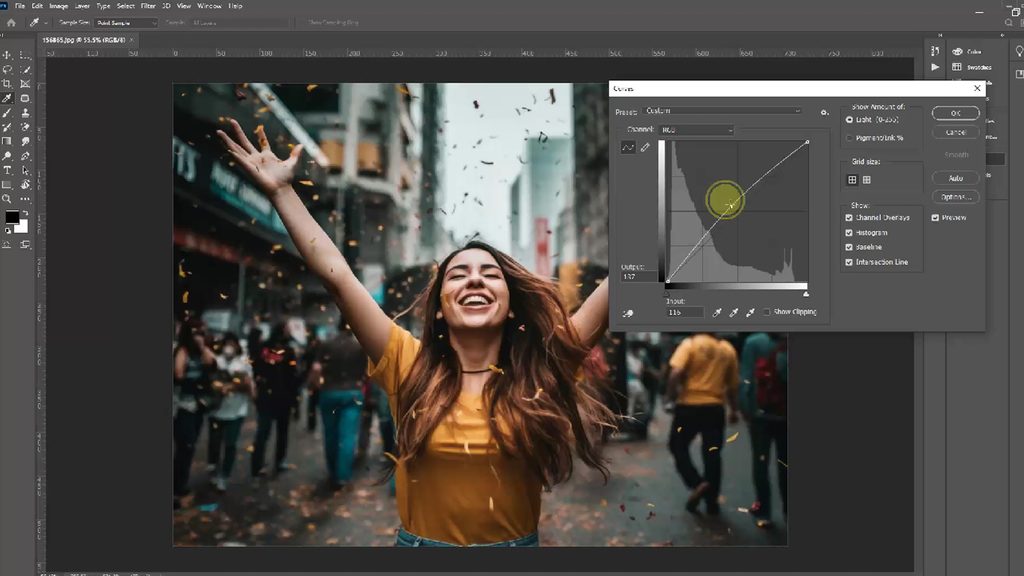
Click on the ‘Image’ option in the top menu bar, then click on ‘Adjustments’ and select ‘Curves’. You can then adjust the lighting of the image to your liking. Here, you will find a curved line in the middle; moving it up or down allows you to adjust the image’s lighting. The keyboard shortcut for this is Ctrl+M.
Number (5):- Level With Curve
Finally, you can effectively adjust the lighting of an image by using the options described in numbers 3 and 4. In other words, by using the ‘Levels’ and ‘Curves’ tools, you can significantly improve the lighting of a dark image. To achieve this, you need to use both options correctly.
In Hindi:-
दोस्तों, आज के ब्लॉग में हम सीखेंगे कि फ़ोटोशॉप में फ़ोटो में लाइट कैसे जोड़ी जाए—यह गाइड शुरुआती लोगों के लिए बनाई गई है। हम देखेंगे कि किसी व्यक्ति की फ़ोटो या किसी चीज़ (ऑब्जेक्ट) को कैसे रोशन किया जाए—यानी किसी अंधेरी इमेज में ब्राइटनेस और कंट्रास्ट कैसे लाया जाए। हम फ़ोटोशॉप के पाँच खास टूल्स का इस्तेमाल करेंगे जिनकी मदद से हम सबसे अंधेरी इमेज में भी लाइट जोड़ सकते हैं, जिससे सब्जेक्ट या ऑब्जेक्ट चमकदार दिखेगा। हालाँकि दूसरे सॉफ़्टवेयर या मोबाइल ऐप्स का इस्तेमाल करके भी लाइट जोड़ी जा सकती है, लेकिन इमेज में लाइटिंग के लिए फ़ोटोशॉप सबसे अच्छे नतीजे देता है। तो, आइए इन पाँच फ़ोटोशॉप टूल्स के बारे में जानते हैं। ये टूल्स फ़ोटोशॉप के नए वर्शन जैसे 2019, 2020, 2021, 2022, 2023 या लेटेस्ट रिलीज़ में बहुत अच्छे से काम करते हैं। आइए इस प्रोसेस को पाँच स्टेप्स में समझते हैं।
हम इस टॉपिक को पाँच स्टेप्स में कवर करेंगे। इस ब्लॉग को पढ़ने के बाद, वीडियो ट्यूटोरियल ज़रूर देखें; इसका लिंक पेज के नीचे दिया गया है।
नंबर (1):-
फ़ोटोशॉप खोलें, टॉप मेनू बार में ‘Filter’ ऑप्शन पर जाएँ और इसकी सेटिंग्स खोलने के लिए ‘Camera Raw Filter’ चुनें (या शॉर्टकट Ctrl+Shift+A का इस्तेमाल करें)। सबसे पहले, हम इमेज में लाइट जोड़ने के लिए ‘Temperature’ और ‘Tint’ सेटिंग्स को एडजस्ट करेंगे। इसके बाद, हम ‘Exposure’ ऑप्शन का इस्तेमाल करेंगे—जो शायद Camera Raw Filter में सबसे ज़रूरी सेटिंग है—ताकि इमेज को अच्छे से रोशन किया जा सके।
इसके बाद, हम ‘Contrast’, ‘Highlights’, ‘Shadows’, ‘Whites’ और ‘Blacks’ ऑप्शंस का इस्तेमाल करके लाइटिंग को और एडजस्ट कर सकते हैं; इनसे हम लाइट और कलर बैलेंस को ठीक से सेट कर सकते हैं। आप इमेज को और बेहतर बनाने के लिए ‘Texture’, ‘Clarity’, ‘Dehaze’, ‘Vibrance’ और ‘Saturation’ जैसे दूसरे ऑप्शंस का भी इस्तेमाल कर सकते हैं। इस फ़ीचर में ‘Curves’ ऑप्शन भी मिलता है, जिससे आप किसी भी इमेज में लाइटिंग एडजस्ट कर सकते हैं; हालाँकि फ़ोटोशॉप में एक अलग Curves टूल भी होता है, लेकिन आप यहाँ लाइटिंग एडजस्ट करने के लिए ‘Color Mixer’ ऑप्शन का भी इस्तेमाल कर सकते हैं।
नंबर (2):-
टॉप मेनू बार में ‘Image’ ऑप्शन पर क्लिक करें, फिर ‘Adjustments’ पर क्लिक करें और ‘Brightness/Contrast’ चुनें। इसके बाद आप अपनी पसंद के अनुसार इमेज की ब्राइटनेस और कंट्रास्ट को एडजस्ट कर सकते हैं। इस ऑप्शन में, आप स्लाइडर्स (हैंडल्स) को आगे-पीछे करके लाइटिंग को एडजस्ट कर सकते हैं। इसके लिए कीबोर्ड शॉर्टकट Alt+I+A+C है।
नंबर (3):-
ऊपर मेनू बार में ‘Image’ ऑप्शन पर क्लिक करें, फिर ‘Adjustments’ पर क्लिक करें और ‘Levels’ चुनें। इसके बाद आप अपनी ज़रूरत के हिसाब से इमेज की लाइटिंग को एडजस्ट कर सकते हैं। इस ऑप्शन में तीन स्लाइडर्स होते हैं: एक बाईं ओर, एक दाईं ओर और एक बीच में। आप इन स्लाइडर्स को हिलाकर लाइटिंग को एडजस्ट कर सकते हैं; नीचे दो और स्लाइडर्स भी होते हैं। इसके लिए कीबोर्ड शॉर्टकट Ctrl+L है।
नंबर (4):-
ऊपर मेनू बार में ‘Image’ ऑप्शन पर क्लिक करें, फिर ‘Adjustments’ पर क्लिक करें और ‘Curves’ चुनें। इसके बाद आप अपनी पसंद के अनुसार इमेज की लाइटिंग को एडजस्ट कर सकते हैं। यहाँ आपको बीच में एक मुड़ी हुई लाइन (curve) दिखेगी; इसे ऊपर या नीचे करके आप इमेज की लाइटिंग को एडजस्ट कर सकते हैं। इसके लिए कीबोर्ड शॉर्टकट Ctrl+M है।
नंबर (5):-
आखिर में, आप नंबर 3 और 4 में बताए गए ऑप्शंस का इस्तेमाल करके इमेज की लाइटिंग को अच्छी तरह से एडजस्ट कर सकते हैं। दूसरे शब्दों में, ‘Levels’ और ‘Curves’ टूल्स का इस्तेमाल करके आप किसी डार्क इमेज की लाइटिंग को काफी बेहतर बना सकते हैं। ऐसा करने के लिए, आपको दोनों ऑप्शंस का सही तरीके से इस्तेमाल करना होगा।