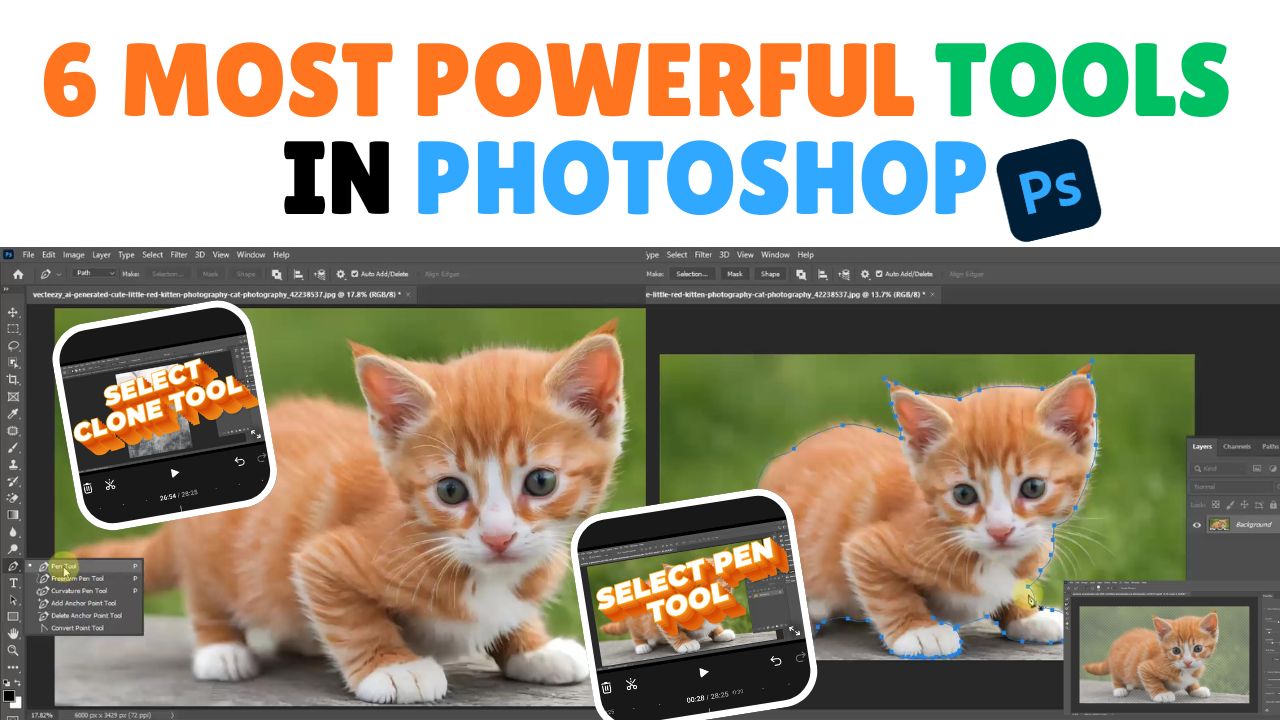
Here are the 6 most powerful tools in Photoshop—tools that stand above all others. By using these six tools, you can perform high-level editing of any kind. Top graphic designers use these tools to take their designs to the next level; without them, Photoshop would be incomplete. Mastering these six tools allows for advanced-level editing.They are: 1) Pen Tool, 2) Object Selection Tool, 3) Quick Selection Tool, 4) Patch Tool, 5) Brush Tool, and 6) Clone Tool. We will learn about these powerful tools step-by-step. You will get a better experience using them in newer versions of Photoshop, such as 19, 20, 21, 22, 23, or the latest release.
So, let’s learn about these 6 powerful tools. After reading this blog post, you can also watch a video tutorial on these tools by clicking the link provided at the bottom of the page.
Number (1): Pen Tool
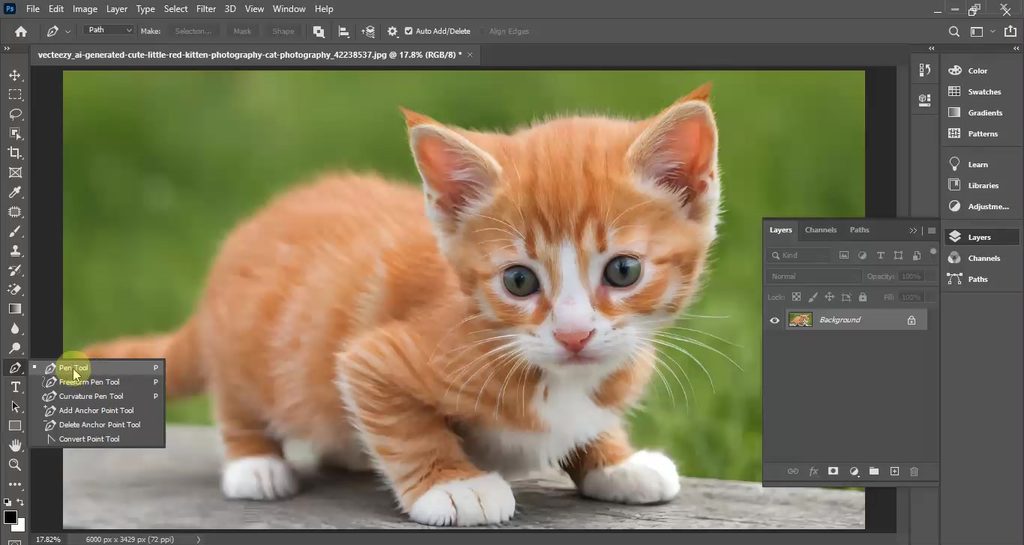
Open Photoshop and look at the toolbar on the left; right-click on the small arrow located slightly down the list to find the Pen Tool option. You can also select the Pen Tool by pressing the ‘P’ key on your keyboard. The Pen Tool is primarily used to remove backgrounds or cut out specific parts of an image. You can also use it to create duplicates of logos or objects.
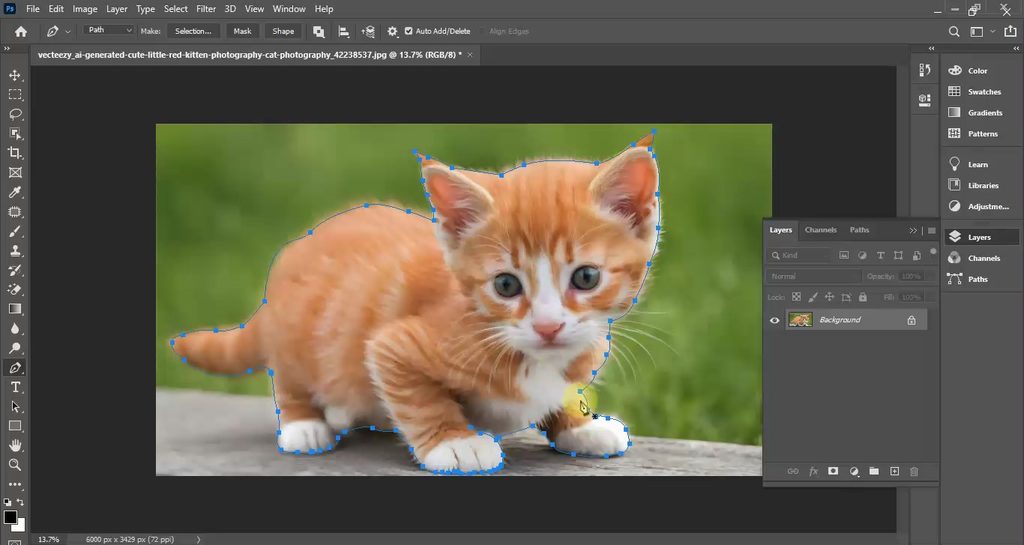
To remove an image’s background, select the Pen Tool. Click on a corner of the image, then drag your mouse and click on the next corner. At the point where you clicked the second corner, hold down the ‘Alt’ key and click to create a specific anchor point. Continue clicking and dragging in this manner, using the Alt key to create points, and stop at the same spot where you started clicking.
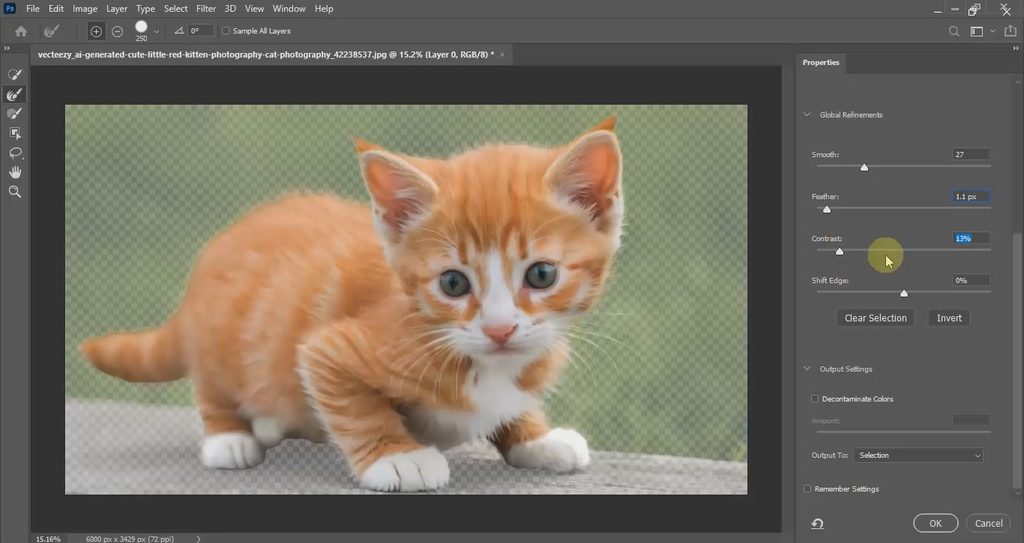
Now, press Ctrl+Alt+R on your keyboard to open the “Refine Edge” box. Here, you will see several options such as Radius, Smooth, Feather, and Contrast. Adjust these four settings slightly; then, look for the “Output To” option and select it to remove the background.
Number (2): Object Selection Tool
This tool allows you to quickly select any image. To use the Object Selection Tool, select it from the toolbar on the left and drag your cursor over the image to make a selection. However, sometimes the selection isn’t perfect; in such cases, you can use the Quick Selection Tool or the Patch Tool. We will explain the use of these two tools in the next section. Afterward, use the Refine Edge settings to remove the background.
Number (3): Quick Selection Tool
The Quick Selection Tool allows you to make precise selections on any image. To use it, select the Quick Selection Tool from the toolbar on the left or press ‘W’ on your keyboard. Start selecting from any corner of the image. To select an area inside the image, hold down the Shift key while selecting; to select an area outside (or to subtract from the selection), hold down the Alt key. Finally, remove the background using the Refine Edge settings.
Number (4): Patch Tool
You can use this tool in two ways: first, to select a specific area of an image; and second, to merge two images together. You can select the Patch Tool by pressing ‘J’ on your keyboard or by choosing it from the toolbar on the left.
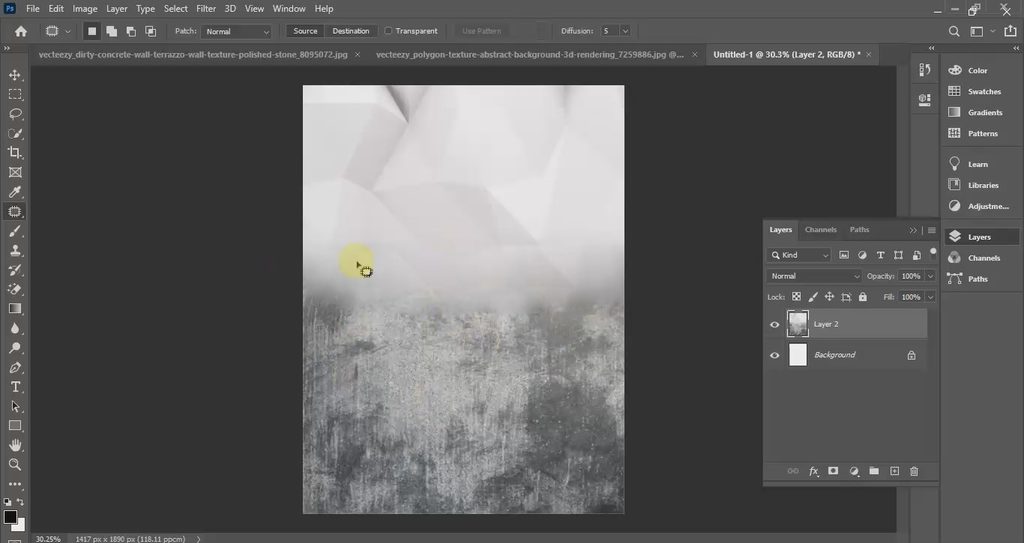
To merge two images, select the Patch Tool. Take two images and apply a mask to both of them. Press ‘B’ on the keyboard to select the Brush tool. Now, place two images side-by-side. Select one image and use the Brush tool to erase parts of it; ensure that a mask is applied to the image and the foreground color is set to black.
Number (5):- Brush Tool
You can use the Brush tool to fill any area of the background or to fill in matching background colors. To do this, press ‘B’ on the keyboard or select the Brush tool from the toolbar on the left. To fill an area with the background’s color, select the Brush tool, hold down the ‘Alt’ key while clicking on the background to sample the color, and then apply it. You can also use the Brush tool to merge two images.
Number (6):-Clone Tool
This tool also allows you to merge two images or fill in matching colors. It is more powerful than the Brush tool for filling colors. Its best feature is the ability to blend two different patterns. Simply select the Clone tool, hold down the ‘Alt’ key while clicking on the background to sample the area, and then use the tool to blend the two different patterns.
In Hindi:-
यहाँ फ़ोटोशॉप के 6 सबसे पावरफ़ुल टूल्स दिए गए हैं—ये ऐसे टूल्स हैं जो बाकी सभी से बेहतर हैं। इन छह टूल्स का इस्तेमाल करके आप किसी भी तरह की हाई-लेवल एडिटिंग कर सकते हैं। टॉप ग्राफ़िक डिज़ाइनर्स अपने डिज़ाइन्स को अगले लेवल पर ले जाने के लिए इन टूल्स का इस्तेमाल करते हैं; इनके बिना फ़ोटोशॉप अधूरा होगा। इन छह टूल्स में महारत हासिल करने से एडवांस्ड-लेवल की एडिटिंग की जा सकती है। ये हैं: 1) पेन टूल, 2) ऑब्जेक्ट सिलेक्शन टूल, 3) क्विक सिलेक्शन टूल, 4) पैच टूल, 5) ब्रश टूल, और 6) क्लोन टूल। हम इन पावरफ़ुल टूल्स के बारे में स्टेप-बाय-स्टेप सीखेंगे। फ़ोटोशॉप के नए वर्शन्स, जैसे 19, 20, 21, 22, 23 या लेटेस्ट रिलीज़ में इनका इस्तेमाल करने पर आपको बेहतर अनुभव मिलेगा।
तो, आइए इन 6 पावरफ़ुल टूल्स के बारे में जानते हैं। इस ब्लॉग पोस्ट को पढ़ने के बाद, आप पेज के नीचे दिए गए लिंक पर क्लिक करके इन टूल्स पर एक वीडियो ट्यूटोरियल भी देख सकते हैं।
नंबर (1): Pen Tool
फ़ोटोशॉप खोलें और बाईं ओर मौजूद टूलबार को देखें; पेन टूल ऑप्शन खोजने के लिए लिस्ट में थोड़ा नीचे मौजूद छोटे तीर (arrow) पर राइट-क्लिक करें। आप अपने कीबोर्ड पर ‘P’ की (key) दबाकर भी पेन टूल चुन सकते हैं। पेन टूल का इस्तेमाल मुख्य रूप से बैकग्राउंड हटाने या किसी इमेज के खास हिस्सों को काटने के लिए किया जाता है। आप इसका इस्तेमाल लोगो या ऑब्जेक्ट्स के डुप्लिकेट बनाने के लिए भी कर सकते हैं।
इमेज का बैकग्राउंड हटाने के लिए, पेन टूल चुनें। इमेज के एक कोने पर क्लिक करें, फिर अपने माउस को ड्रैग करें और अगले कोने पर क्लिक करें। जिस पॉइंट पर आपने दूसरा कोना क्लिक किया था, वहाँ ‘Alt’ की (key) दबाकर रखें और एक खास एंकर पॉइंट बनाने के लिए क्लिक करें। इसी तरह क्लिक और ड्रैग करना जारी रखें, पॉइंट्स बनाने के लिए Alt की (key) का इस्तेमाल करें, और उसी जगह पर रुकें जहाँ से आपने क्लिक करना शुरू किया था।
अब, “Refine Edge” बॉक्स खोलने के लिए अपने कीबोर्ड पर Ctrl+Alt+R दबाएँ। यहाँ, आपको Radius, Smooth, Feather और Contrast जैसे कई ऑप्शन्स दिखाई देंगे। इन चार सेटिंग्स को थोड़ा एडजस्ट करें; फिर, “Output To” ऑप्शन देखें और बैकग्राउंड हटाने के लिए उसे चुनें।
नंबर (2): Object Selection Tool
यह टूल आपको किसी भी इमेज को तेज़ी से चुनने (select) की सुविधा देता है। Object Selection Tool का इस्तेमाल करने के लिए, इसे बाईं ओर मौजूद टूलबार से चुनें और सिलेक्शन बनाने के लिए इमेज पर अपना कर्सर ड्रैग करें। हालांकि, कभी-कभी सिलेक्शन एकदम सही नहीं होता; ऐसे मामलों में, आप Quick Selection Tool या Patch Tool का इस्तेमाल कर सकते हैं। हम अगले सेक्शन में इन दोनों टूल्स के इस्तेमाल के बारे में बताएंगे। इसके बाद, बैकग्राउंड हटाने के लिए Refine Edge सेटिंग्स का इस्तेमाल करें।
नंबर (3): Quick Selection Tool
Quick Selection Tool की मदद से आप किसी भी इमेज पर सटीक सिलेक्शन कर सकते हैं। इसका इस्तेमाल करने के लिए, बाईं ओर मौजूद टूलबार से Quick Selection Tool चुनें या अपने कीबोर्ड पर ‘W’ दबाएं। इमेज के किसी भी कोने से सिलेक्शन शुरू करें। इमेज के अंदर का एरिया चुनने के लिए, सिलेक्शन करते समय Shift की (key) दबाए रखें; बाहर का एरिया चुनने (या सिलेक्शन से हटाने) के लिए, Alt की (key) दबाए रखें। आखिर में, Refine Edge सेटिंग्स का इस्तेमाल करके बैकग्राउंड हटा दें।
नंबर (4): Patch Tool
आप इस टूल का इस्तेमाल दो तरह से कर सकते हैं: पहला, इमेज का कोई खास एरिया चुनने के लिए; और दूसरा, दो इमेज को एक साथ मिलाने (merge करने) के लिए। आप कीबोर्ड पर ‘J’ दबाकर या बाईं ओर मौजूद टूलबार से Patch Tool चुन सकते हैं।
दो इमेज को मिलाने के लिए, Patch Tool चुनें। दो इमेज लें और दोनों पर मास्क लगाएं। ब्रश टूल चुनने के लिए कीबोर्ड पर ‘B’ दबाएं। अब, दोनों इमेज को अगल-बगल रखें। एक इमेज चुनें और ब्रश टूल का इस्तेमाल करके उसके कुछ हिस्सों को मिटाएं; ध्यान रखें कि इमेज पर मास्क लगा हो और फोरग्राउंड कलर काला (black) सेट हो।
नंबर (5):- Brush Tool
आप बैकग्राउंड के किसी भी हिस्से को भरने या उससे मिलते-जुलते बैकग्राउंड कलर भरने के लिए Brush Tool का इस्तेमाल कर सकते हैं। ऐसा करने के लिए, कीबोर्ड पर ‘B’ दबाएं या बाईं ओर मौजूद टूलबार से Brush Tool चुनें। बैकग्राउंड के कलर से किसी हिस्से को भरने के लिए, Brush Tool चुनें, कलर का सैंपल लेने के लिए बैकग्राउंड पर क्लिक करते समय ‘Alt’ की (key) दबाए रखें, और फिर उसे अप्लाई करें। आप दो इमेज को मिलाने के लिए भी Brush Tool का इस्तेमाल कर सकते हैं।
नंबर (6):- Clone Tool
यह टूल भी आपको दो इमेज को मिलाने या मिलते-जुलते कलर भरने की सुविधा देता है। कलर भरने के मामले में यह Brush Tool से ज़्यादा पावरफुल है। इसकी सबसे अच्छी खासियत दो अलग-अलग पैटर्न को मिलाने की क्षमता है। बस ‘क्लोन टूल’ चुनें, ‘Alt’ की (key) दबाकर रखें और बैकग्राउंड पर क्लिक करके उस हिस्से का सैंपल लें, फिर उस टूल का इस्तेमाल करके दोनों अलग-अलग पैटर्न को मिलाएँ।