
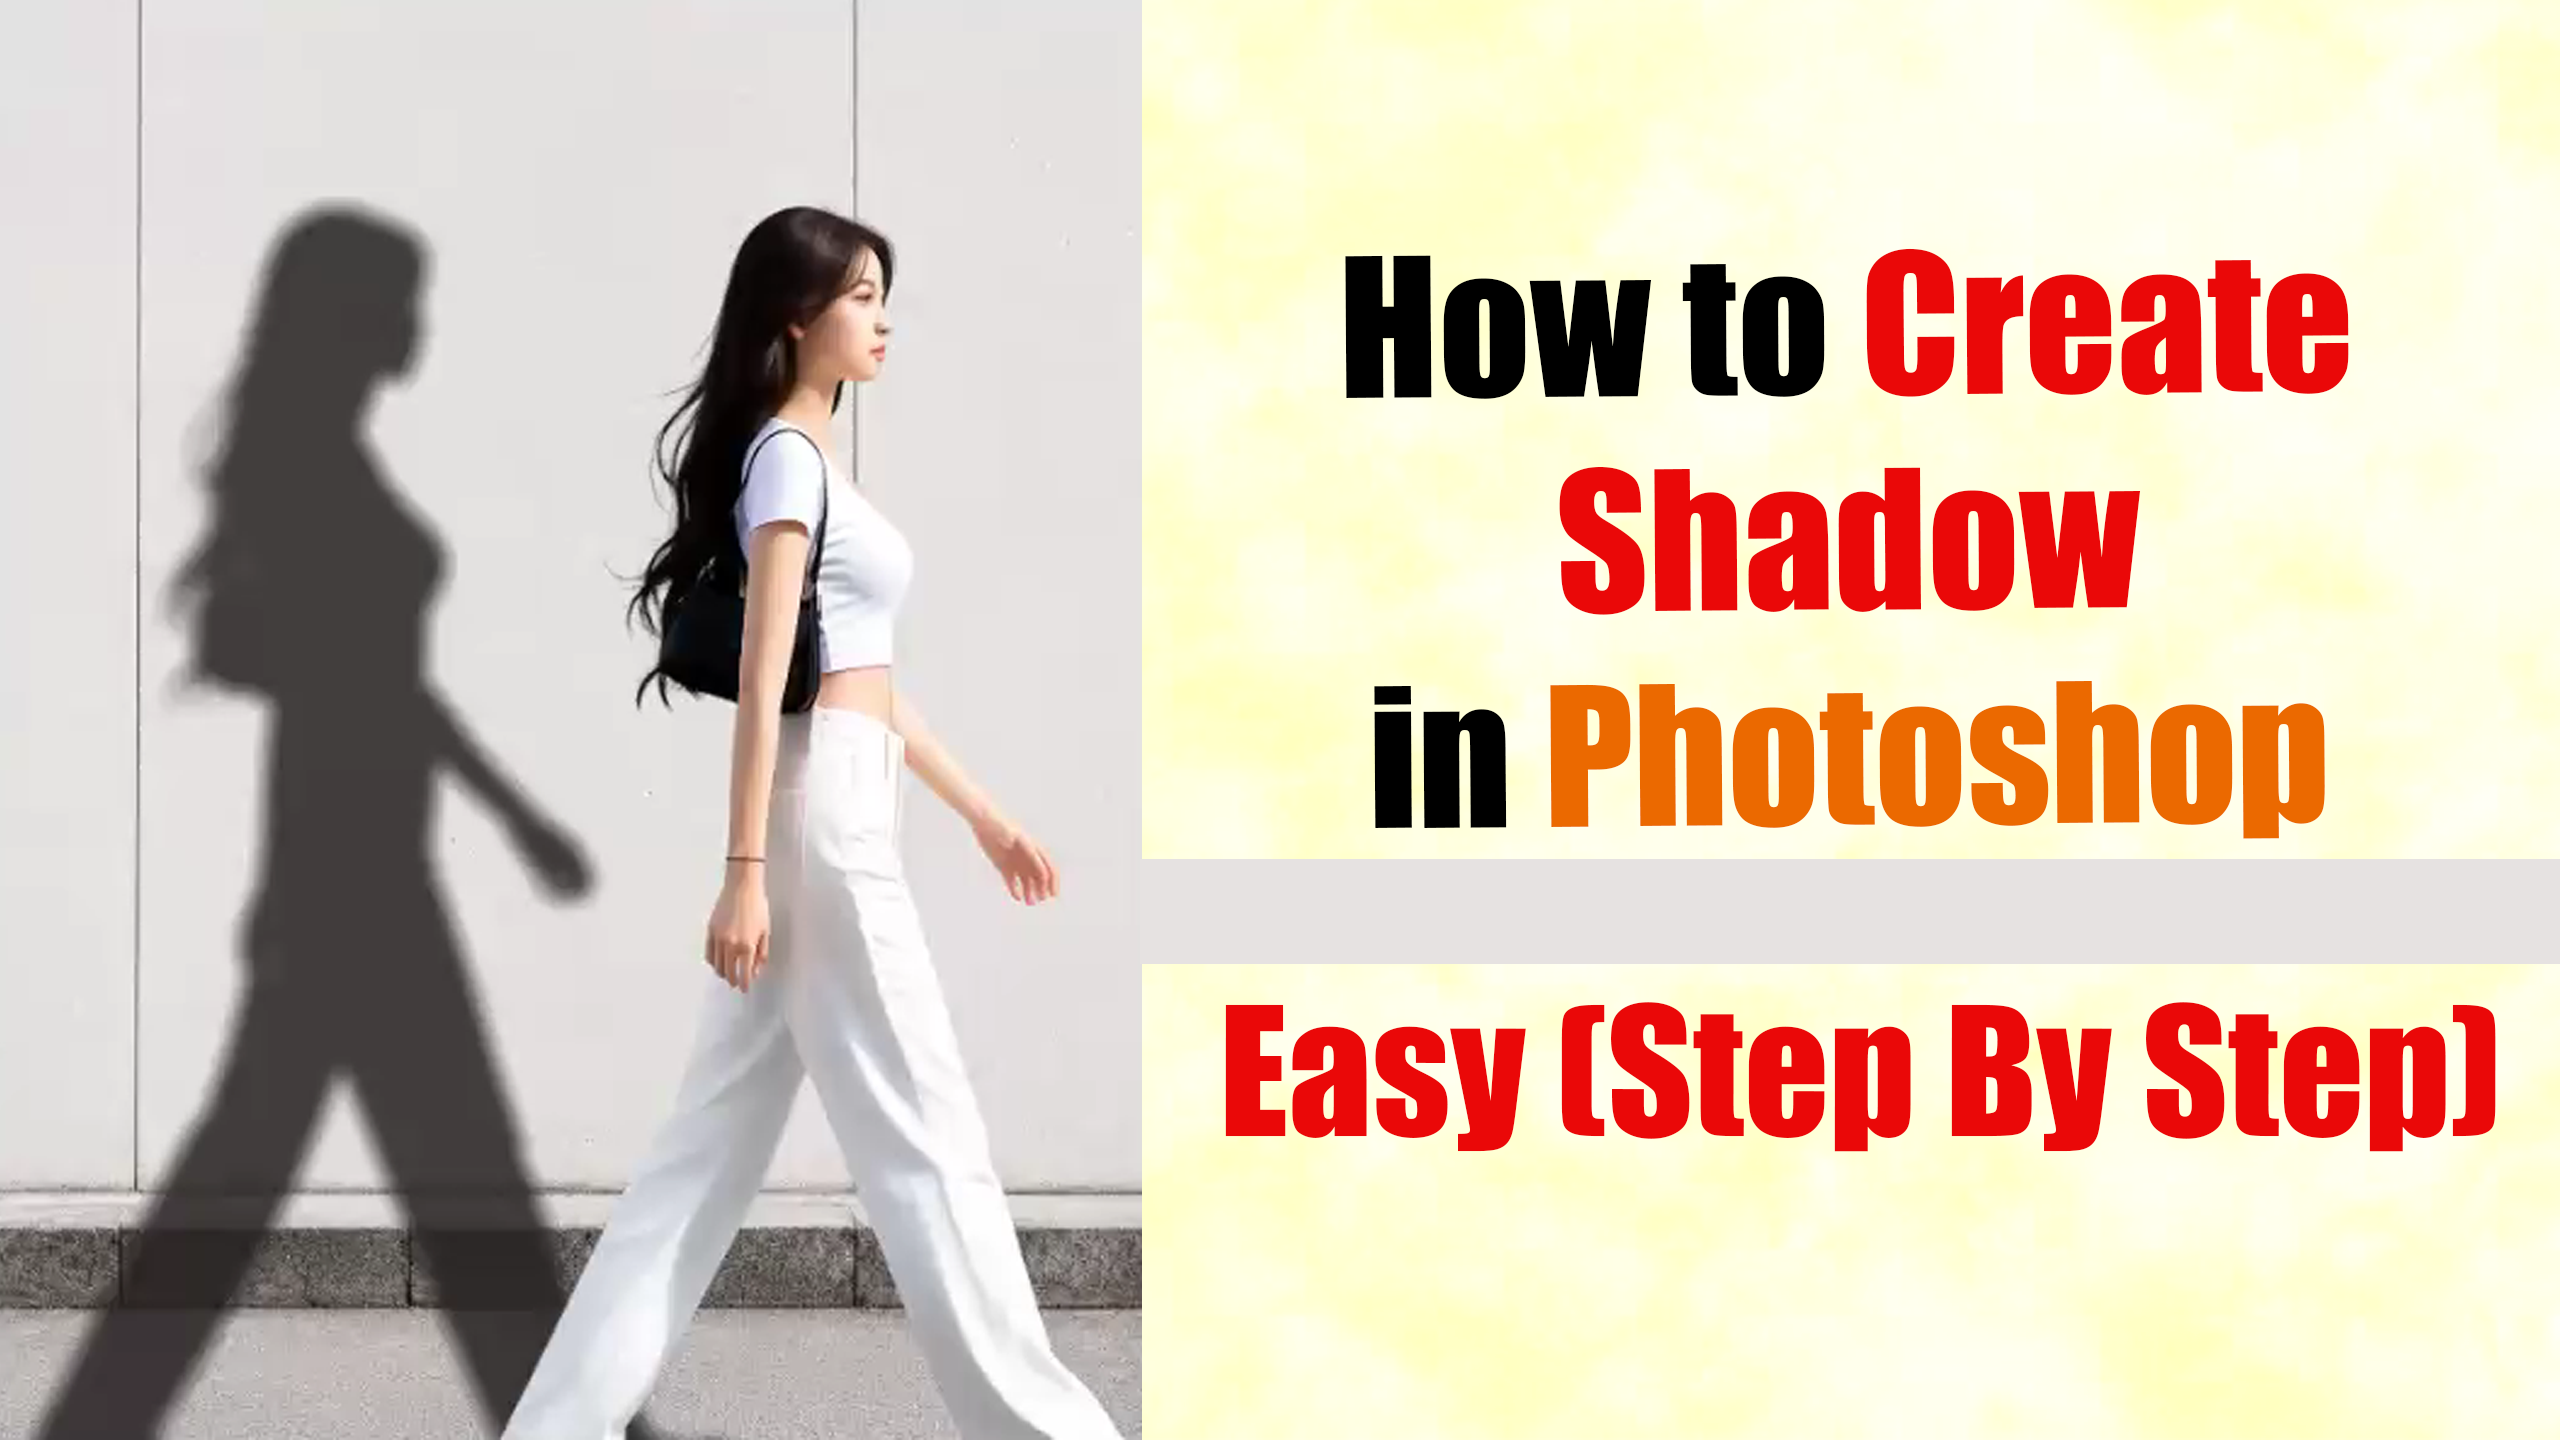
How to Create Shadow in Photoshop | Easy Shadow Effect Tutorial
Friends, in today’s blog, we will learn how to create a shadow to the side or back of a person. We will do this with great ease and perfection—the result will look so flawless that it will be hard to tell it was edited. It is a very simple process. We will use Photoshop software for this; using a newer version (like 19, 20, 23, or the latest) is recommended as they offer better performance and graphics. So, let’s learn how to do this in four steps.
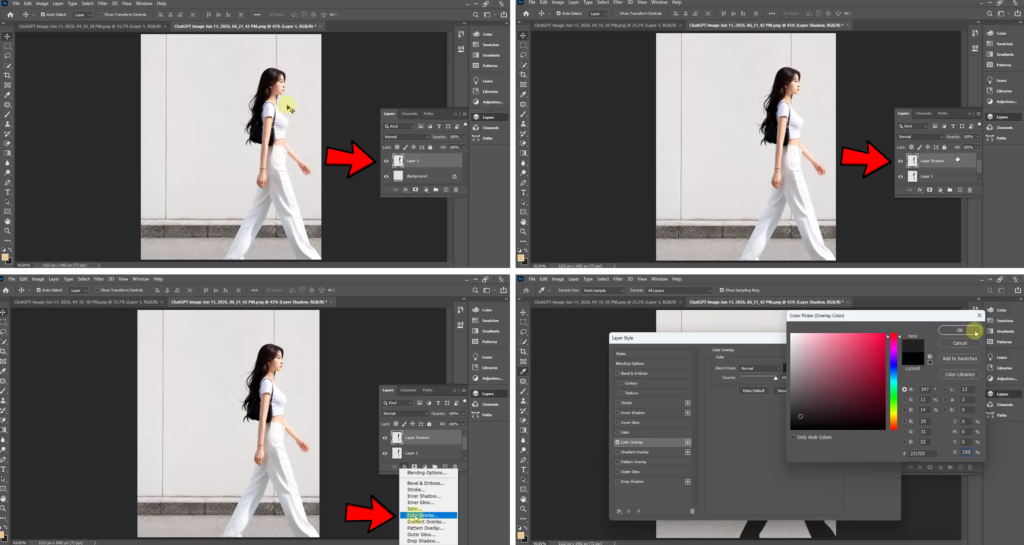
Step (1):-
Download a background image from the internet that allows for a visible shadow, and then place the image of the person onto that background, positioning them perfectly.
Step (2):-
Create a copy of the person’s layer and rename it “layer shadow.” Select this layer, click on the “FX” option at the bottom, and choose “Color Overlay.” A Layer Style box will open; within it, locate the color picker, go to the CMYK section, and set the “K” value to 100.
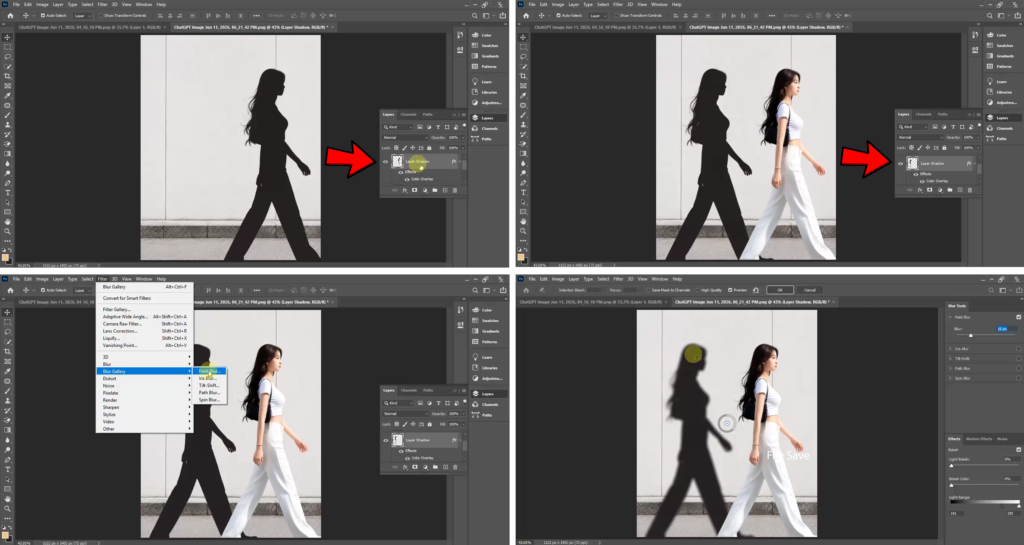
Step (3):-
The copied layer (named “layer shadow”) will now turn into a black shadow. Move this black shadow layer behind the original subject layer.
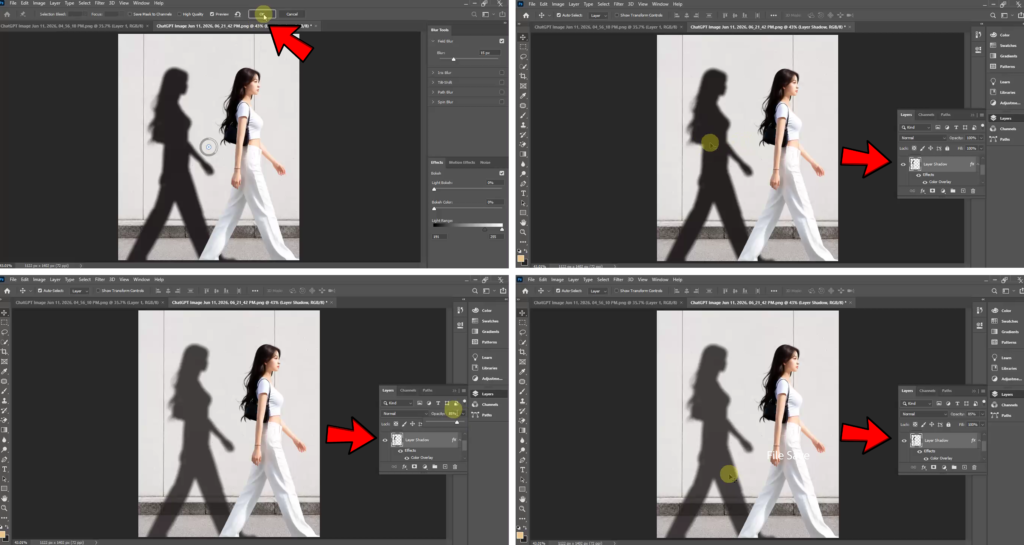
Step (4):-
Select the “layer shadow” layer, go to the top menu bar, click on “Filter,” select “Blur Gallery,” and then choose “Field Blur.” Adjust the settings slightly and click “OK.” Finally, click on the “Opacity” option and reduce the opacity level. In addition to these four steps.
you can also watch the video tutorial by clicking on the video link provided below.
In Hindi
दोस्तों, आज के ब्लॉग में हम सीखेंगे कि किसी व्यक्ति की परछाई (shadow) को उसके बगल में या पीछे कैसे बनाया जाए। हम इसे बहुत आसानी और परफेक्शन के साथ करेंगे—इसका नतीजा इतना शानदार होगा कि पता ही नहीं चलेगा कि इसे एडिट किया गया है। यह बहुत आसान प्रोसेस है। इसके लिए हम Photoshop सॉफ़्टवेयर का इस्तेमाल करेंगे; नए वर्शन (जैसे 19, 20, 23 या लेटेस्ट) का इस्तेमाल करने की सलाह दी जाती है क्योंकि उनमें बेहतर परफ़ॉर्मेंस और ग्राफ़िक्स मिलते हैं। तो आइए, चार स्टेप्स में इसे करना सीखते हैं।
स्टेप (1):-
इंटरनेट से एक ऐसी बैकग्राउंड इमेज डाउनलोड करें जिसमें परछाई साफ़ दिखे, और फिर उस बैकग्राउंड पर व्यक्ति की इमेज को सही जगह पर रखें।
स्टेप (2):-
व्यक्ति वाली लेयर की एक कॉपी बनाएं और उसका नाम “layer shadow” रखें। इस लेयर को चुनें, नीचे दिए गए “FX” ऑप्शन पर क्लिक करें और “Color Overlay” चुनें। एक Layer Style बॉक्स खुलेगा; उसमें कलर पिकर ढूंढें, CMYK सेक्शन में जाएं और “K” की वैल्यू को 100 पर सेट करें।
स्टेप (3):-
कॉपी की गई लेयर (“layer shadow” नाम वाली) अब काली परछाई में बदल जाएगी। इस काली परछाई वाली लेयर को ओरिजिनल सब्जेक्ट लेयर के पीछे ले जाएं।
स्टेप (4):-
“layer shadow” लेयर को चुनें, ऊपर मेन्यू बार में जाएं, “Filter” पर क्लिक करें, “Blur Gallery” चुनें और फिर “Field Blur” चुनें। सेटिंग्स को थोड़ा एडजस्ट करें और “OK” पर क्लिक करें। आखिर में, “Opacity” ऑप्शन पर क्लिक करें और ओपेसिटी लेवल को कम करें। इन चार स्टेप्स के अलावा, आप नीचे दिए गए वीडियो लिंक पर क्लिक करके वीडियो ट्यूटोरियल भी देख सकते हैं।
You can also watch a video tutorial accompanying this blog post by clicking on the link provided below.
Video Tutorial