
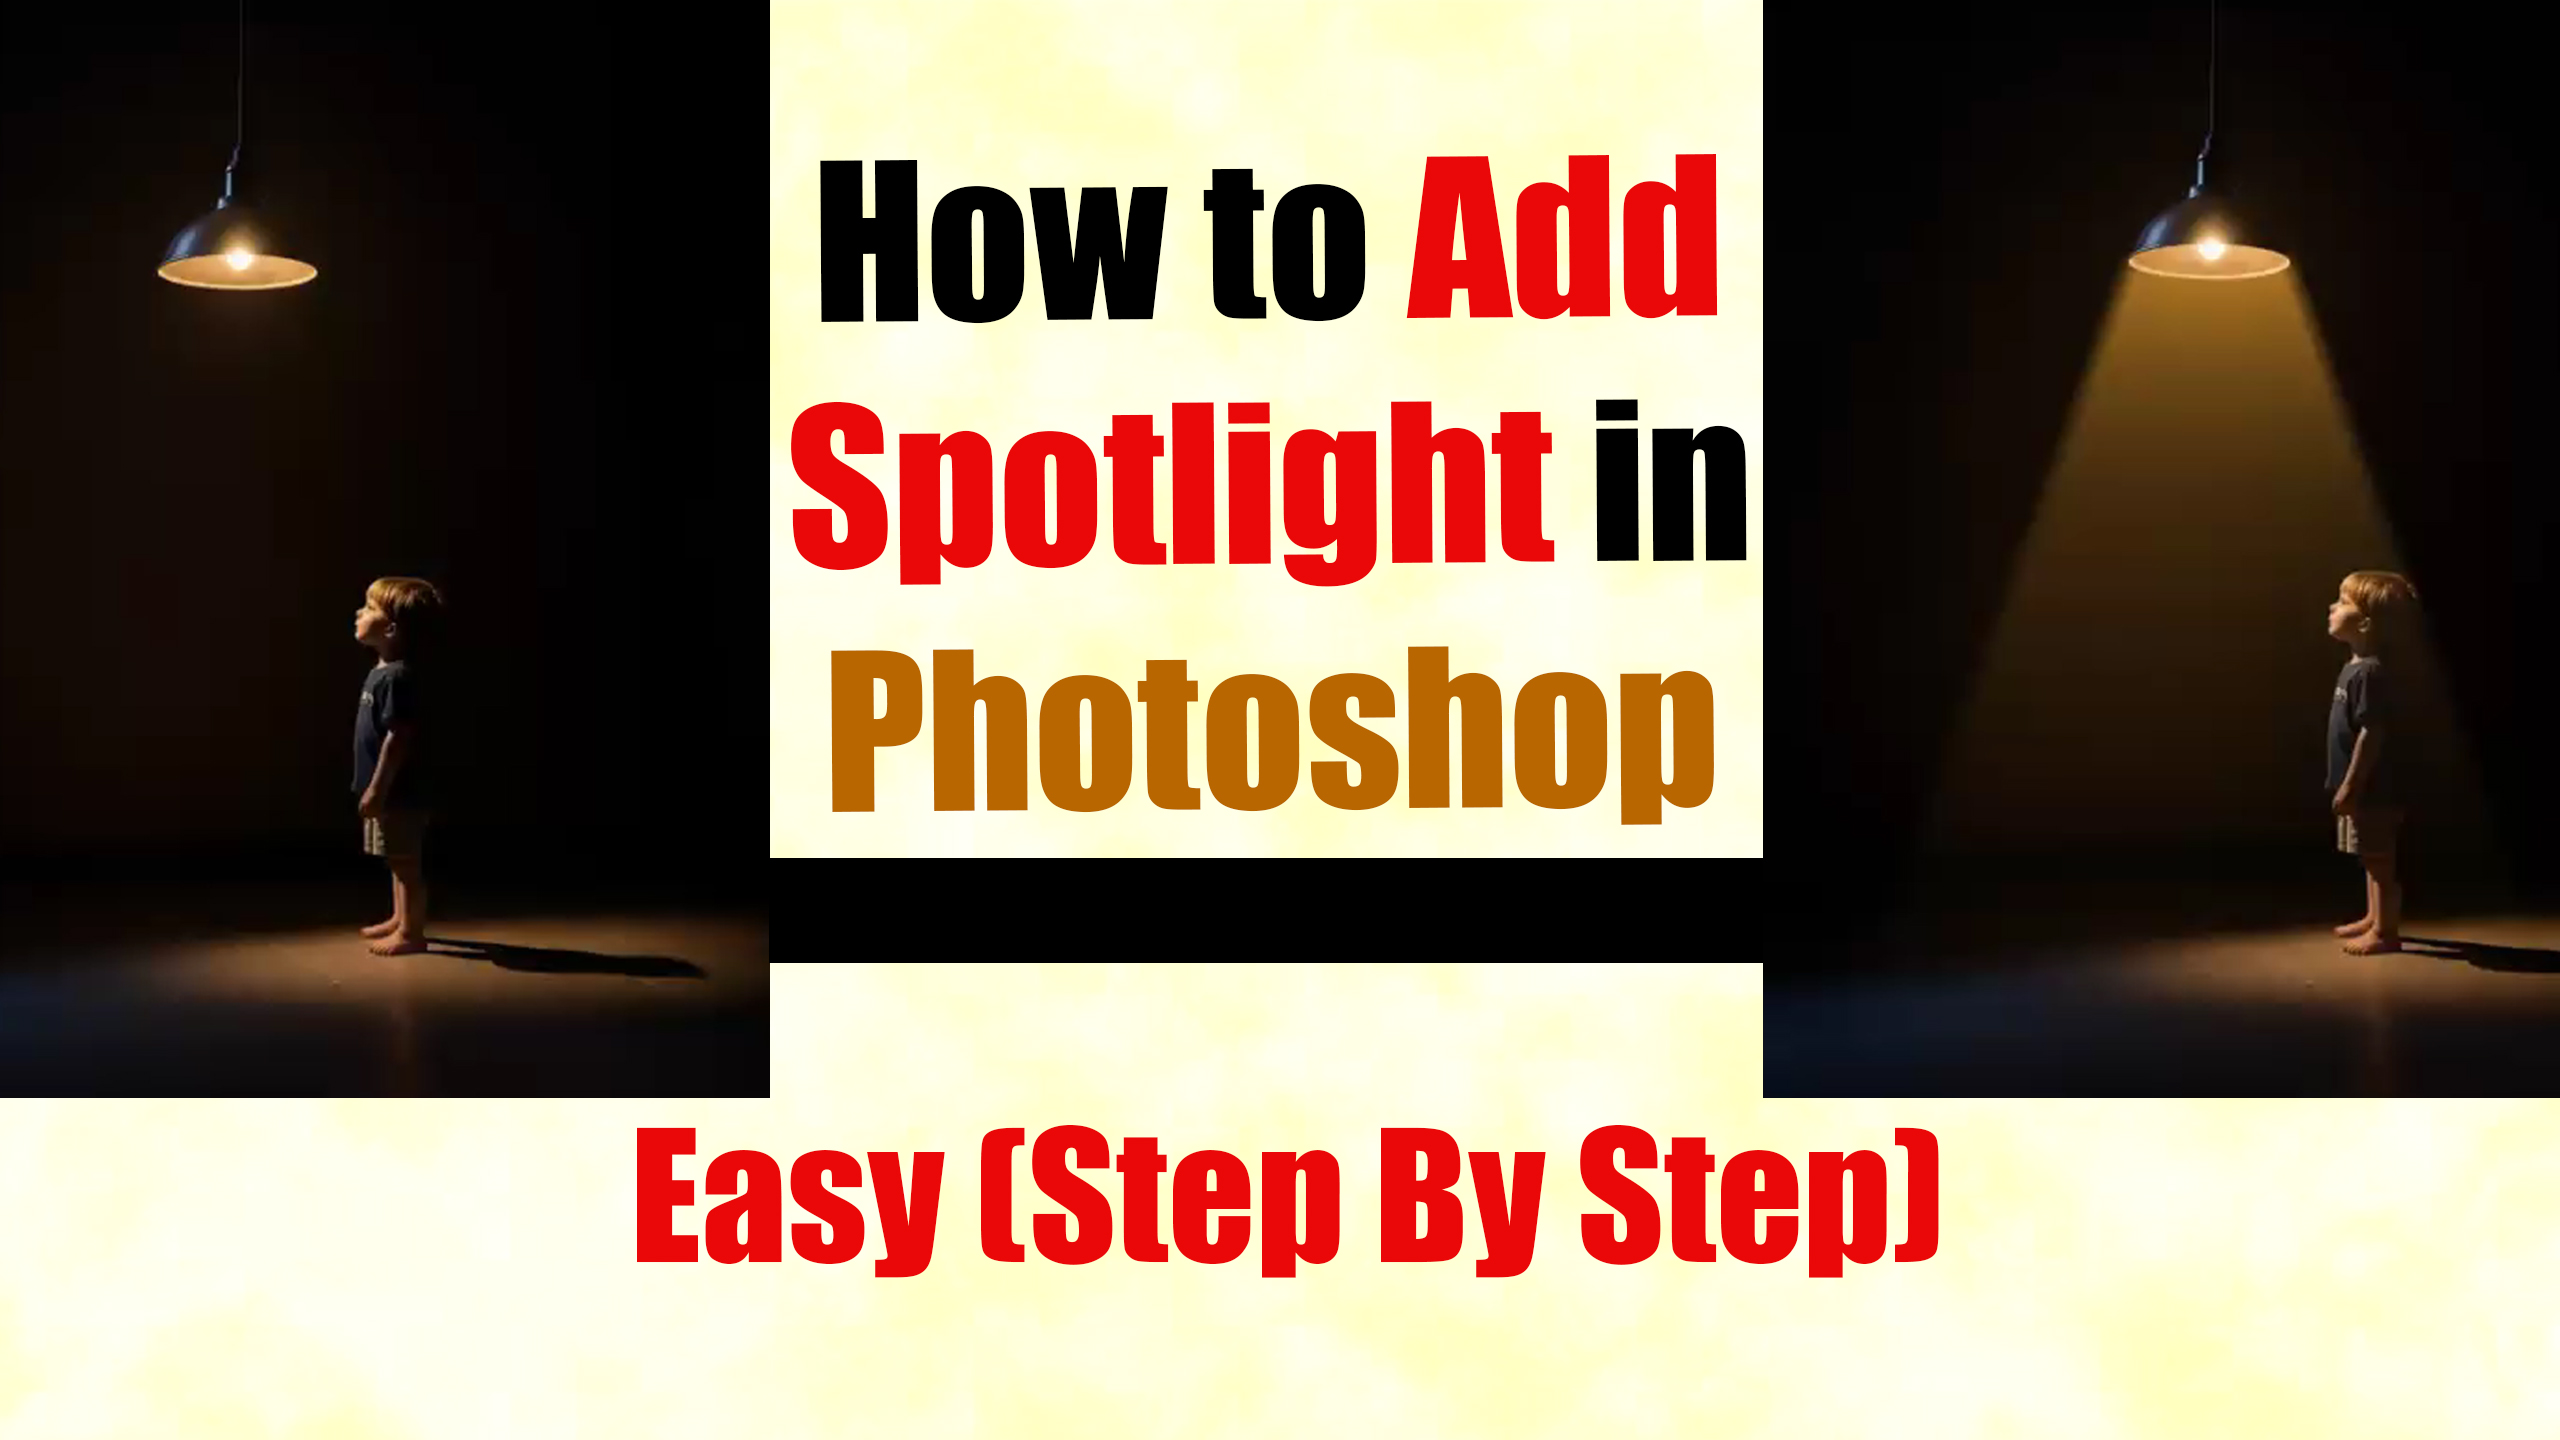
Friends, in today’s blog, we will learn how to add a light effect in Photoshop. We will do this with great ease and precision—so perfectly that the result will look completely natural. You will find the process very simple. We will be using Photoshop software for this; using a newer version (like 19, 20, 23, or the latest) is recommended, as they offer better performance and graphics. So, let’s learn how to do this in five steps.
Step (1):-
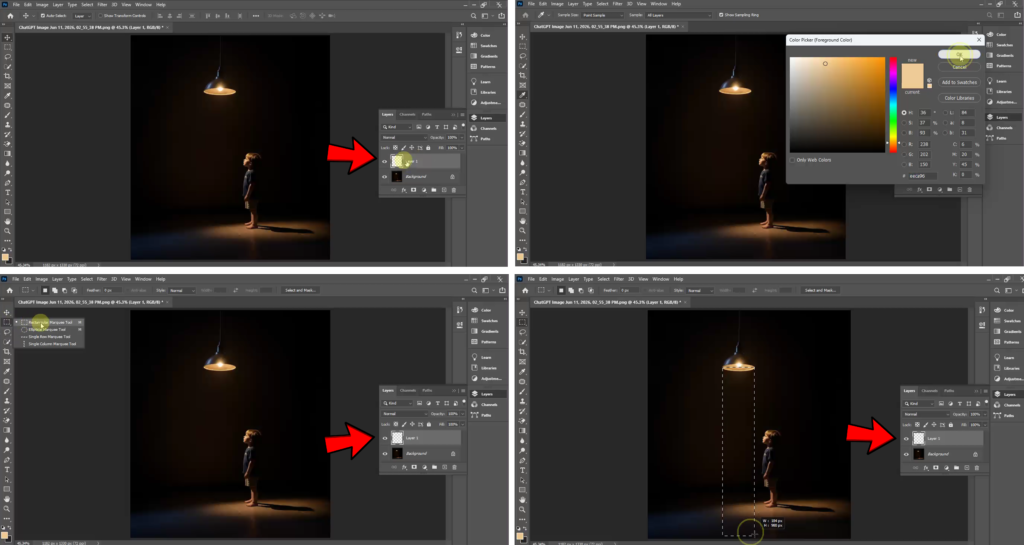
First, select an image showing a child looking up at a bulb; a darker image works best. Now, create a new layer to add light to the bulb.
Step (2):-
For the new layer, use the Color Picker (Foreground Color) to select a light-like color.
Step (3):-
Now, go to the toolbar on the left, select the Rectangular Marquee Tool, and create a selection extending from the bulb downwards.
Step (4):-
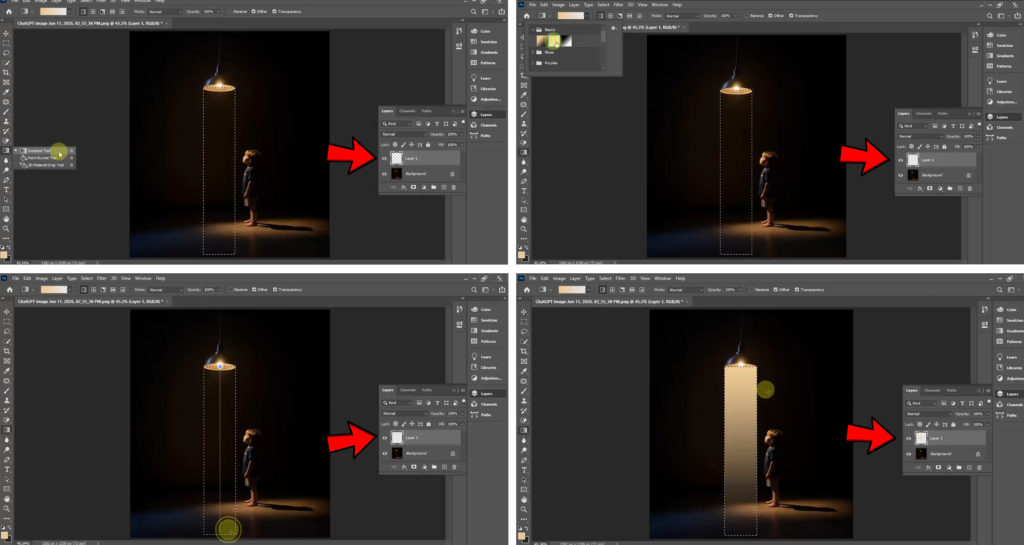
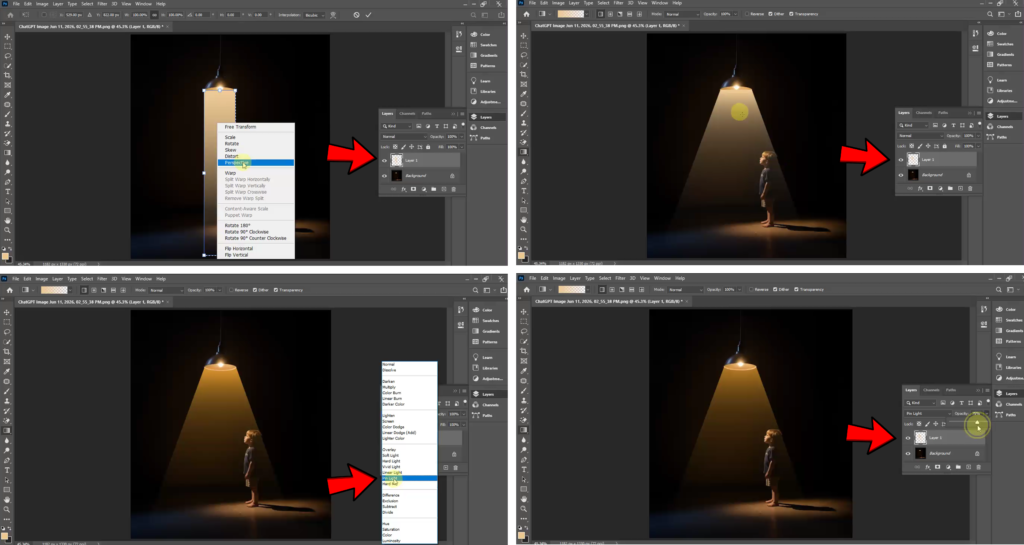
Click on the Gradient Tool in the left toolbar. Go to the basic options and select the one that looks like a transparency gradient. Apply it within your selection, dragging downwards. Then, press Ctrl+T, right-click on the selection, choose the ‘Perspective’ option, and adjust it slightly.
Step (5):-
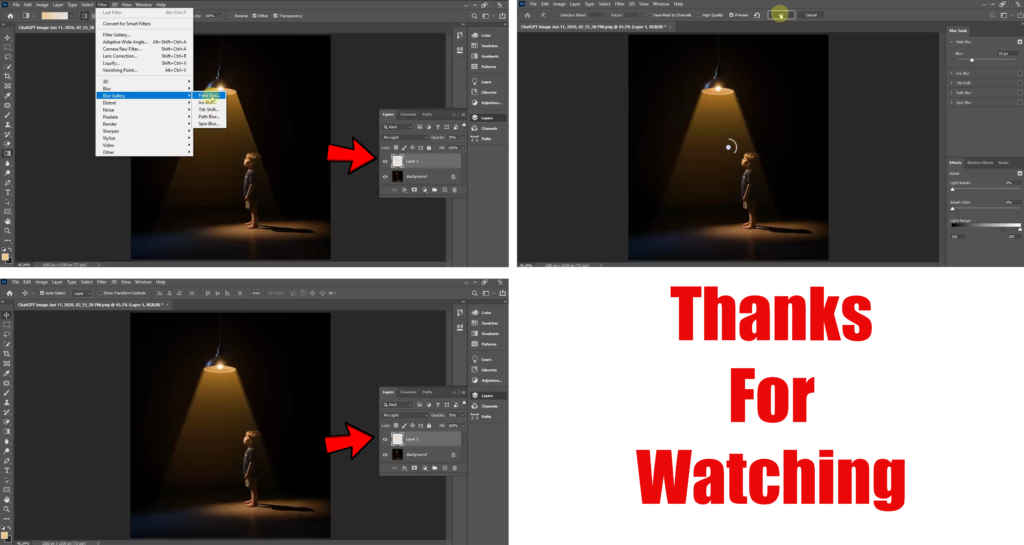
Now, right-click on the ‘FX’ option (on the right side), select ‘Pin Light’, and slightly reduce the opacity. Go to the ‘Filter’ menu at the top, navigate to ‘Blur Gallery’, click on ‘Field Blur’, adjust the settings to your liking, and click ‘OK’. In addition to these steps.
in Hindi
दोस्तों, आज के ब्लॉग में हम सीखेंगे कि फ़ोटोशॉप में लाइट इफ़ेक्ट कैसे जोड़ें। हम इसे बहुत आसानी और बारीकी से करेंगे—इतनी अच्छी तरह से कि नतीजा बिल्कुल नैचुरल लगेगा। आपको यह प्रोसेस बहुत आसान लगेगा। इसके लिए हम फ़ोटोशॉप सॉफ़्टवेयर का इस्तेमाल करेंगे; नए वर्शन (जैसे 19, 20, 23 या लेटेस्ट) का इस्तेमाल करना बेहतर है, क्योंकि उनमें बेहतर परफ़ॉर्मेंस और ग्राफ़िक्स मिलते हैं। तो आइए, पाँच स्टेप्स में इसे करना सीखते हैं।
स्टेप (1):-
सबसे पहले, एक ऐसी इमेज चुनें जिसमें कोई बच्चा बल्ब की तरफ़ ऊपर देख रहा हो; थोड़ी डार्क इमेज इसके लिए सबसे अच्छी रहेगी। अब, बल्ब में लाइट जोड़ने के लिए एक नई लेयर बनाएँ।
स्टेप (2):-
नई लेयर के लिए, कलर पिकर (फ़ोरग्राउंड कलर) का इस्तेमाल करके लाइट जैसा कोई रंग चुनें।
स्टेप (3):-
अब, बाईं ओर मौजूद टूलबार पर जाएँ, ‘रेक्टेंगुलर मार्की टूल’ (Rectangular Marquee Tool) चुनें और बल्ब से नीचे की तरफ़ एक सिलेक्शन बनाएँ।
स्टेप (4):-
बाएँ टूलबार में ‘ग्रेडिएंट टूल’ (Gradient Tool) पर क्लिक करें। बेसिक ऑप्शन में जाएँ और ट्रांसपेरेंसी ग्रेडिएंट जैसा दिखने वाला ऑप्शन चुनें। इसे अपने सिलेक्शन के अंदर नीचे की तरफ़ ड्रैग करके अप्लाई करें। फिर, Ctrl+T दबाएँ, सिलेक्शन पर राइट-क्लिक करें, ‘पर्सपेक्टिव’ (Perspective) ऑप्शन चुनें और इसे थोड़ा एडजस्ट करें।
स्टेप (5):-
अब, ‘FX’ ऑप्शन (दाईं ओर) पर राइट-क्लिक करें, ‘पिन लाइट’ (Pin Light) चुनें और ओपैसिटी (opacity) को थोड़ा कम करें। ऊपर ‘फ़िल्टर’ (Filter) मेनू में जाएँ, ‘ब्लर गैलरी’ (Blur Gallery) पर जाएँ, ‘फ़ील्ड ब्लर’ (Field Blur) पर क्लिक करें, अपनी पसंद के हिसाब से सेटिंग्स एडजस्ट करें और ‘OK’ पर क्लिक करें। इन स्टेप्स के अलावा, आप नीचे दिए गए लिंक पर क्लिक करके हमारा वीडियो ट्यूटोरियल भी देख सकते हैं।
you can also watch our video tutorial by clicking the link provided below.
Video Tutorial:- https://youtu.be/zmcOsAnGc1w