
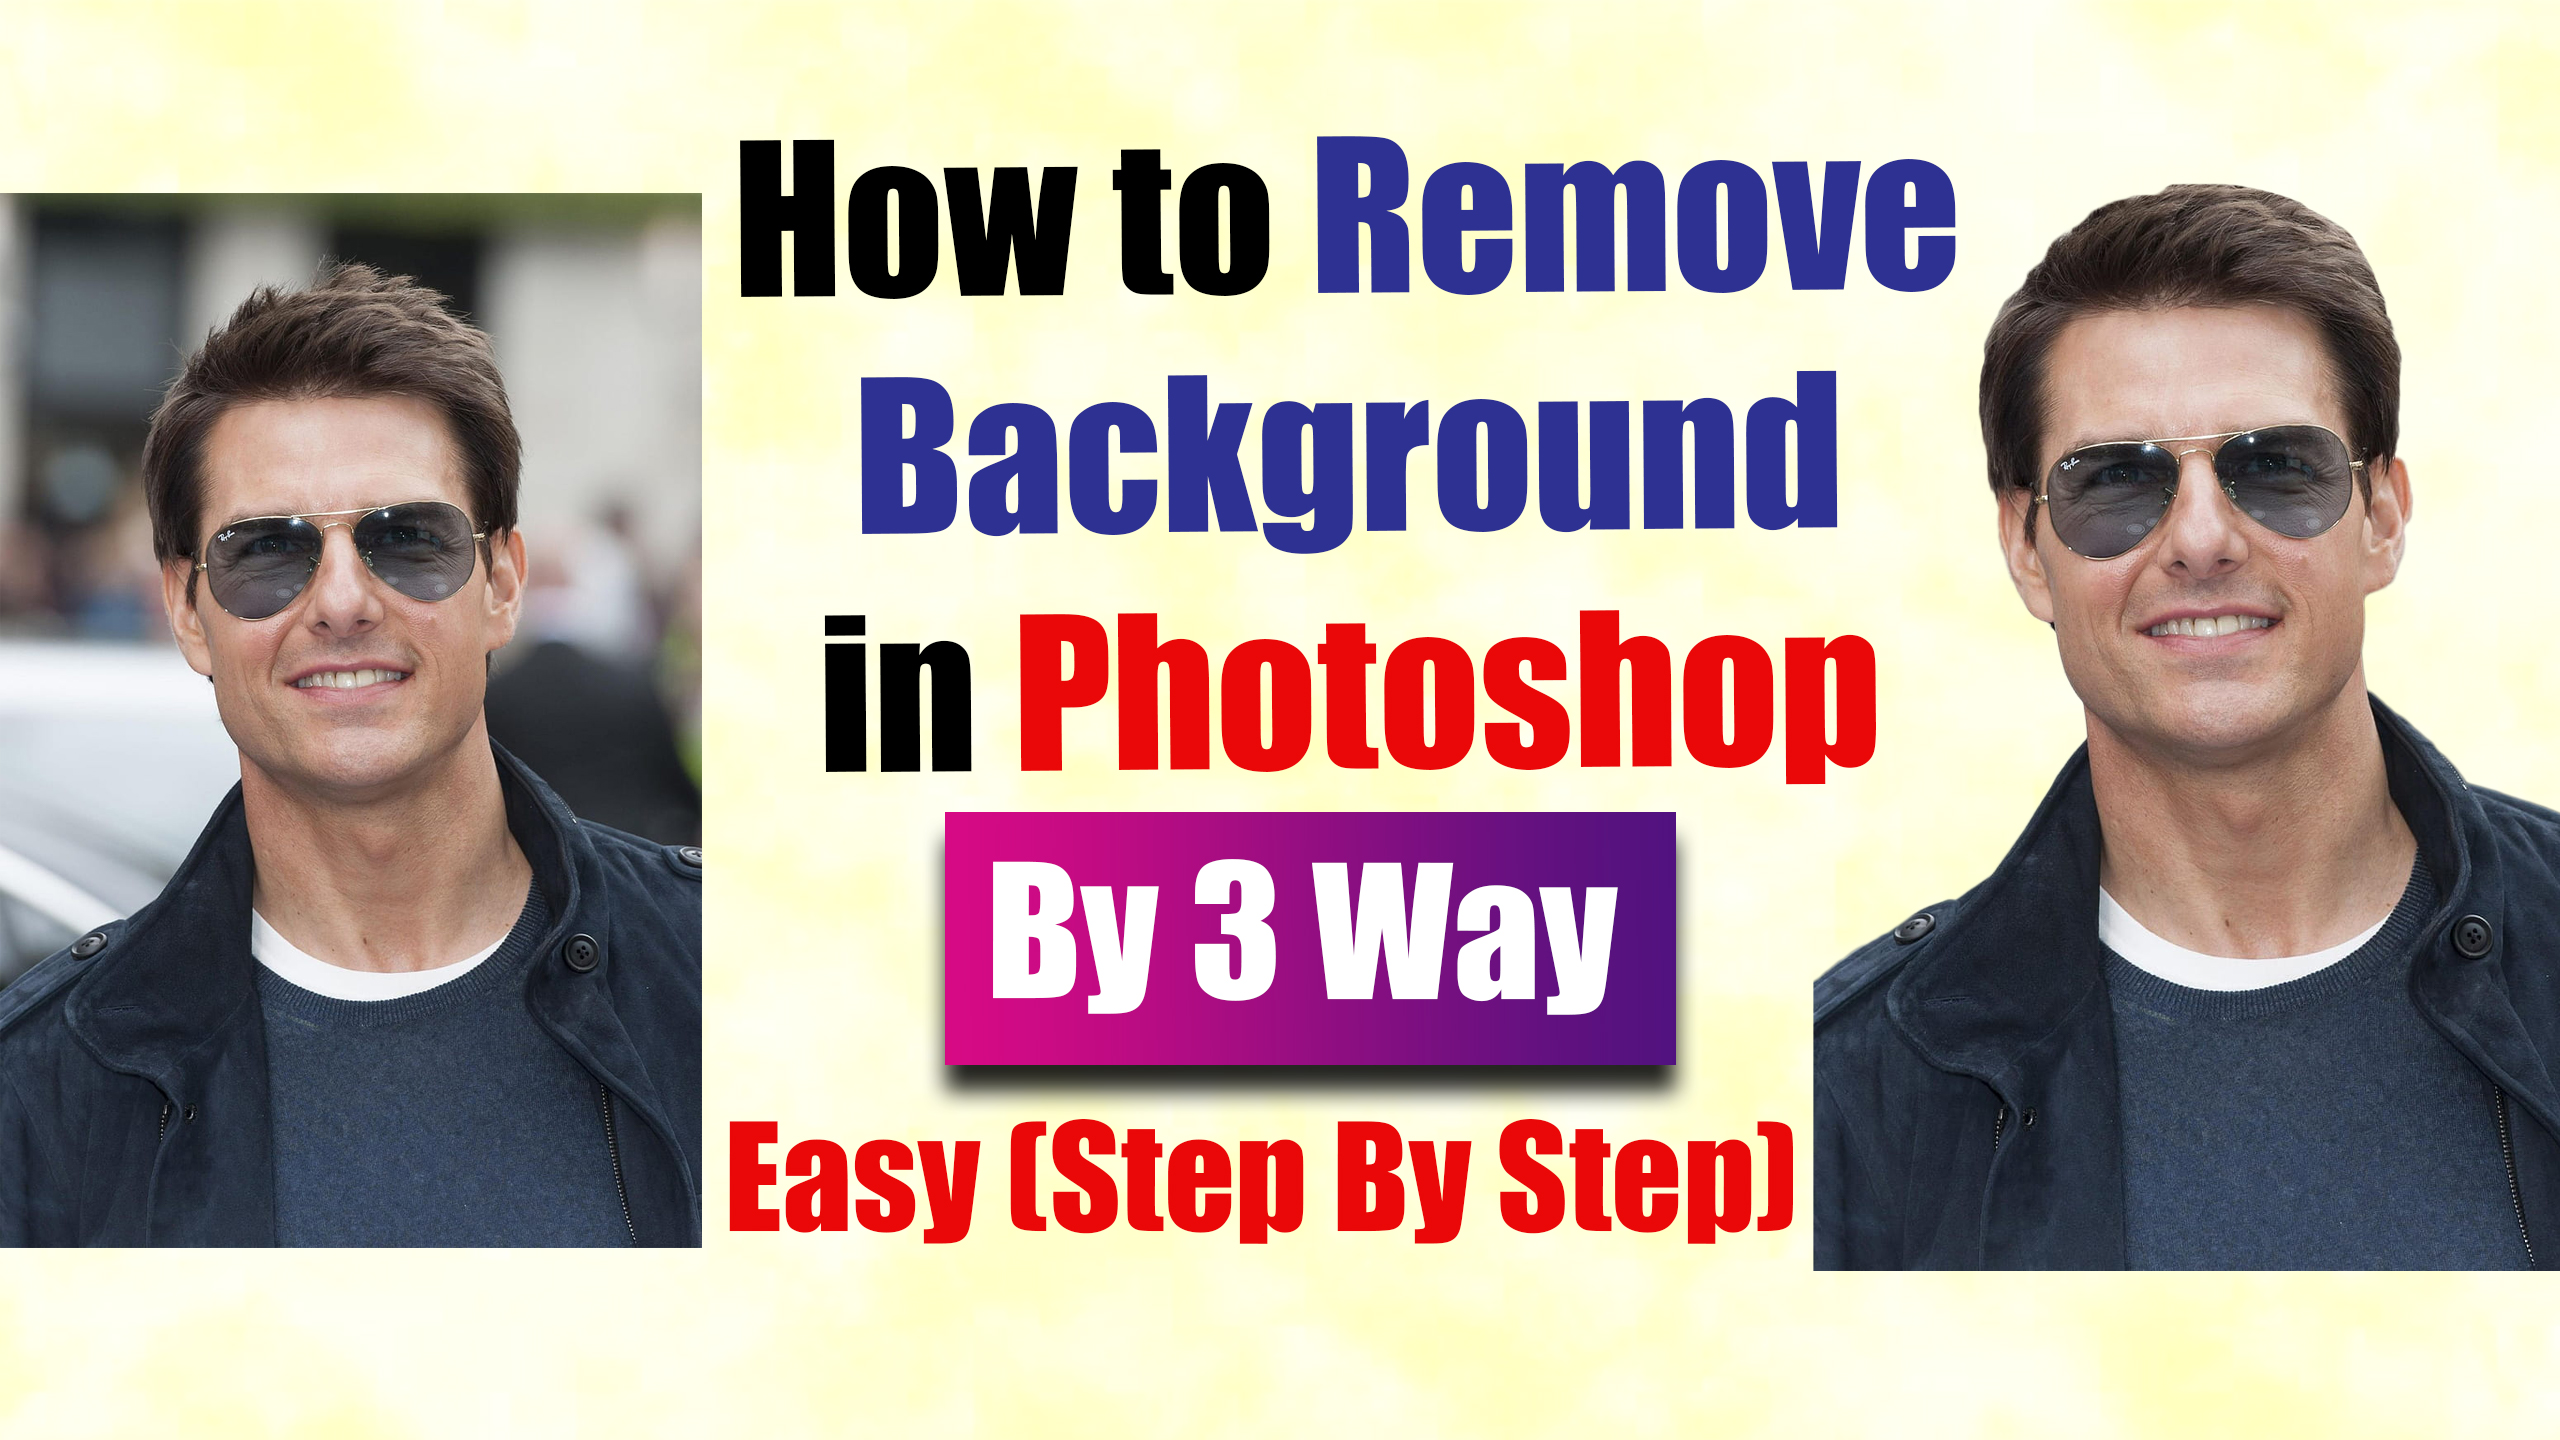
Friends, in today’s blog, we will learn how to remove the background of any image in Photoshop with great precision. We will perform the cutout meticulously, ensuring the edges are perfectly defined. We will use three different methods—or rather, three specific tools—to achieve this. These tools are: 1) Subject Selection, 2) Pen Tool, and 3) Object Selection Tool. We will explore each of these in detail. It is best to use a newer version of Photoshop (such as version 19, 20, 23, or the latest releases) for better performance and graphics. So, let’s learn this process in three steps.
We will cover this process in 3 steps. After reading this blog, be sure to watch the video tutorial; you can find the link to the video at the bottom of the page.
Step (1):-
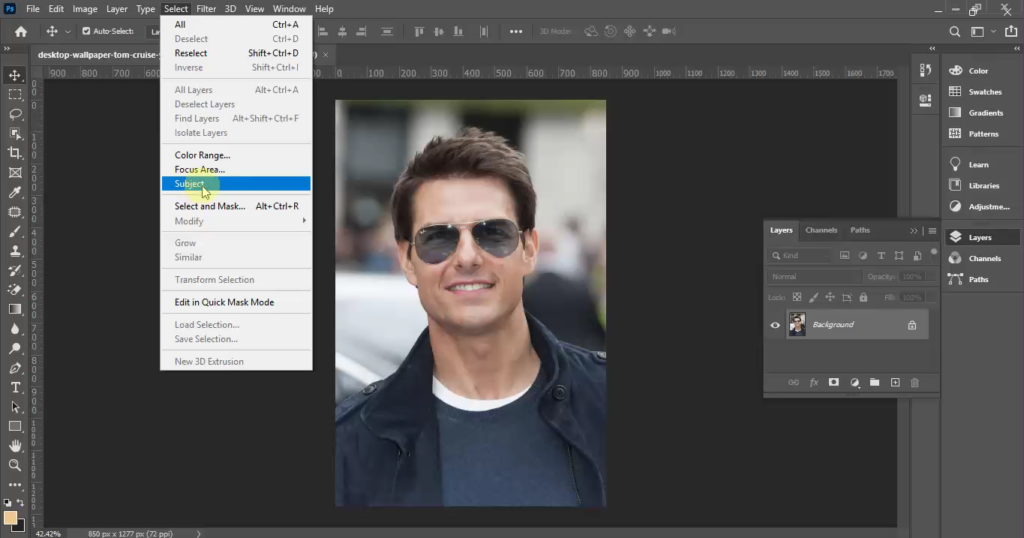
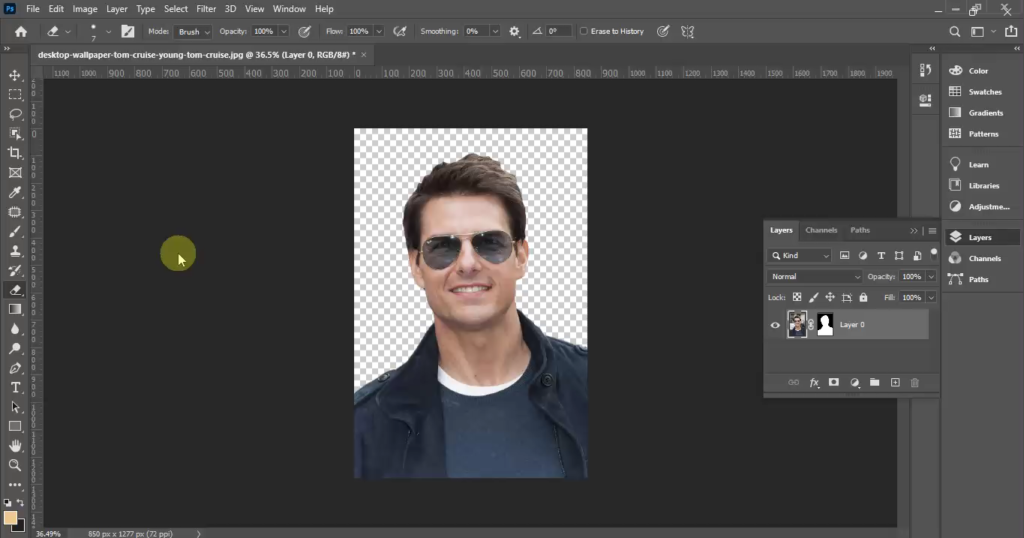
First, open the image whose background you want to remove in Photoshop. Go to the top menu bar, click on ‘Select’, and then click on ‘Subject’ to select the main object. Next, select the ‘Patch Tool’ from the toolbar on the left (shortcut key: J). Use the Patch Tool to refine the selection right up to the object’s edges. If the selection extends beyond the object, hold the ‘Alt’ key and drag the selection boundary inward to the edge; conversely, if the selection is inside the edge, hold the ‘Shift’ key and drag it outward to the edge. Now, with the object selected, press ‘Ctrl+Alt+R’ to open a dialog box on the right. Adjust the ‘Smooth’, ‘Feather’, and ‘Contrast’ settings as needed, select ‘Layer Mask’ under the ‘Output to’ option, and click ‘OK’ to remove the background. Finally, use the ‘Eraser’ tool from the left toolbar to clean up any remaining background fragments around the object’s edges.
Step (2):-
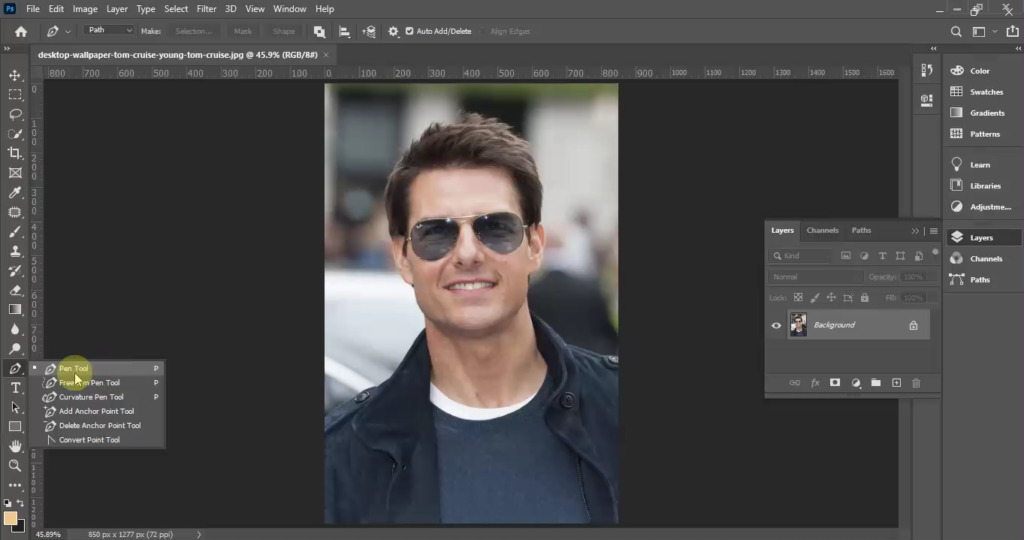
Open the image whose background you want to remove in Photoshop. Next, select the Pen Tool from the toolbar on the left; start creating nodes along the object’s edge by dragging the tool. Then, select the Patch Tool from the toolbar (shortcut key: J) and adjust the selection area to align with the object’s edge. If the selection extends beyond the object, hold the ‘Alt’ key and drag the selection boundary to the edge; conversely, if the selection is inside the edge, hold the ‘Shift’ key and drag it outward to the edge. Now, press ‘Ctrl+Alt+R’ on the selected object to open a panel on the right; adjust the ‘Smooth’, ‘Feather’, and ‘Contrast’ settings as desired. Finally, select ‘Layer Mask’ under the ‘Output to’ option and click ‘OK’ to remove the background. Use the Eraser tool from the toolbar to clean up any remaining background fragments along the object’s edges.
Step (3):-
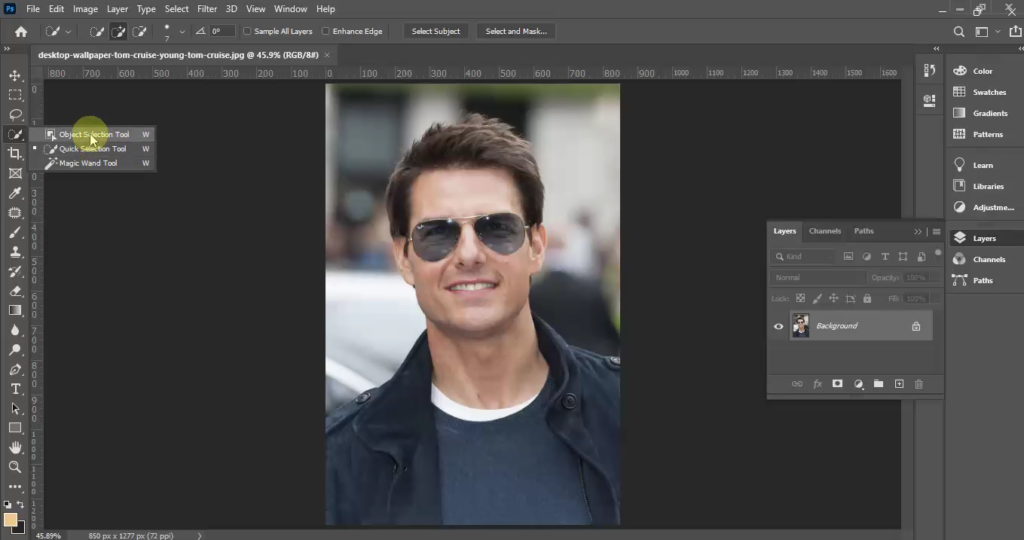
Open the image whose background you want to remove in Photoshop. Next, select the ‘Object Selection Tool’ from the toolbar on the left and drag your mouse over the object to select it; this tool allows for quick selection by simply dragging over the object. If the selection extends beyond the object, hold the ‘Alt’ key and drag the selection boundary to the edge; conversely, if the selection is inside the edge, hold the ‘Shift’ key and drag it outward to the edge. Now, press ‘Ctrl+Alt+R’ on the selected object to open a panel on the right; adjust the ‘Smooth’, ‘Feather’, and ‘Contrast’ settings as desired. Finally, select ‘Layer Mask’ under the ‘Output to’ option and click ‘OK’ to remove the background. Use the Eraser tool from the toolbar to clean up any remaining background fragments along the object’s edges.
In Hindi
दोस्तों, आज के ब्लॉग में हम सीखेंगे कि फ़ोटोशॉप में किसी भी इमेज का बैकग्राउंड बहुत बारीकी से कैसे हटाया जाए। हम कटआउट को बहुत ध्यान से करेंगे ताकि किनारे एकदम साफ़ और सही दिखें। इसके लिए हम तीन अलग-अलग तरीकों—यानी तीन खास टूल्स—का इस्तेमाल करेंगे। ये टूल्स हैं: 1) सब्जेक्ट सिलेक्शन, 2) पेन टूल, और 3) ऑब्जेक्ट सिलेक्शन टूल। हम इन सबके बारे में विस्तार से जानेंगे। बेहतर परफ़ॉर्मेंस और ग्राफ़िक्स के लिए फ़ोटोशॉप का नया वर्शन (जैसे वर्शन 19, 20, 23 या लेटेस्ट रिलीज़) इस्तेमाल करना सबसे अच्छा है। तो आइए, इस प्रोसेस को तीन स्टेप्स में सीखते हैं।
स्टेप (1):-
सबसे पहले, फ़ोटोशॉप में वह इमेज खोलें जिसका बैकग्राउंड आप हटाना चाहते हैं। ऊपर मेनू बार में जाएं, ‘Select’ पर क्लिक करें, और फिर मुख्य ऑब्जेक्ट को चुनने के लिए ‘Subject’ पर क्लिक करें। इसके बाद, बाईं ओर टूलबार से ‘Patch Tool’ चुनें (शॉर्टकट की: J)। ऑब्जेक्ट के किनारों तक सिलेक्शन को ठीक करने के लिए पैच टूल का इस्तेमाल करें। अगर सिलेक्शन ऑब्जेक्ट से बाहर निकल जाता है, तो ‘Alt’ की दबाकर रखें और सिलेक्शन बाउंड्री को अंदर की तरफ किनारे तक खींचें; वहीं, अगर सिलेक्शन किनारे के अंदर है, तो ‘Shift’ की दबाकर रखें और इसे बाहर की तरफ किनारे तक खींचें। अब, ऑब्जेक्ट के चुने होने पर, दाईं ओर एक डायलॉग बॉक्स खोलने के लिए ‘Ctrl+Alt+R’ दबाएं। ज़रूरत के हिसाब से ‘Smooth’, ‘Feather’, और ‘Contrast’ सेटिंग्स को एडजस्ट करें, ‘Output to’ ऑप्शन के तहत ‘Layer Mask’ चुनें, और बैकग्राउंड हटाने के लिए ‘OK’ पर क्लिक करें। आखिर में, ऑब्जेक्ट के किनारों के आस-पास बचे हुए बैकग्राउंड के हिस्सों को साफ़ करने के लिए बाईं ओर टूलबार से ‘Eraser’ टूल का इस्तेमाल करें।
स्टेप (2):-
फ़ोटोशॉप में वह इमेज खोलें जिसका बैकग्राउंड आप हटाना चाहते हैं। इसके बाद, बाईं ओर टूलबार से पेन टूल चुनें; टूल को ड्रैग करके ऑब्जेक्ट के किनारे-किनारे नोड्स बनाना शुरू करें। फिर, टूलबार से पैच टूल चुनें (शॉर्टकट की: J) और सिलेक्शन एरिया को ऑब्जेक्ट के किनारे के हिसाब से एडजस्ट करें। अगर सिलेक्शन ऑब्जेक्ट से बाहर निकल जाता है, तो ‘Alt’ की दबाकर रखें और सिलेक्शन बाउंड्री को किनारे तक खींचें; इसके उलट, अगर सिलेक्शन किनारे के अंदर है, तो ‘Shift’ की (key) दबाकर रखें और उसे बाहर की तरफ किनारे तक खींचें। अब, चुने हुए ऑब्जेक्ट पर ‘Ctrl+Alt+R’ दबाएं ताकि दाईं ओर एक पैनल खुल जाए; अपनी ज़रूरत के हिसाब से ‘Smooth’, ‘Feather’ और ‘Contrast’ सेटिंग्स को एडजस्ट करें। आखिर में, ‘Output to’ ऑप्शन के तहत ‘Layer Mask’ चुनें और बैकग्राउंड हटाने के लिए ‘OK’ पर क्लिक करें। ऑब्जेक्ट के किनारों पर बचे हुए बैकग्राउंड के हिस्सों को साफ़ करने के लिए टूलबार से Eraser टूल का इस्तेमाल करें।
स्टेप (3):-
Photoshop में वह इमेज खोलें जिसका बैकग्राउंड आप हटाना चाहते हैं। इसके बाद, बाईं ओर मौजूद टूलबार से ‘Object Selection Tool’ चुनें और ऑब्जेक्ट को चुनने के लिए उस पर माउस घुमाएं; यह टूल ऑब्जेक्ट पर बस माउस घुमाकर तेज़ी से सिलेक्शन करने की सुविधा देता है। अगर सिलेक्शन ऑब्जेक्ट से बाहर निकल जाता है, तो ‘Alt’ की (key) दबाकर रखें और सिलेक्शन की बाउंड्री को किनारे तक खींचें; इसके उलट, अगर सिलेक्शन किनारे के अंदर है, तो ‘Shift’ की (key) दबाकर रखें और उसे बाहर की तरफ किनारे तक खींचें। अब, चुने हुए ऑब्जेक्ट पर ‘Ctrl+Alt+R’ दबाएं ताकि दाईं ओर एक पैनल खुल जाए; अपनी ज़रूरत के हिसाब से ‘Smooth’, ‘Feather’ और ‘Contrast’ सेटिंग्स को एडजस्ट करें। आखिर में, ‘Output to’ ऑप्शन के तहत ‘Layer Mask’ चुनें और बैकग्राउंड हटाने के लिए ‘OK’ पर क्लिक करें। ऑब्जेक्ट के किनारों पर बचे हुए बैकग्राउंड के हिस्सों को साफ़ करने के लिए टूलबार से Eraser टूल का इस्तेमाल करें।
Video Tutorial:–