
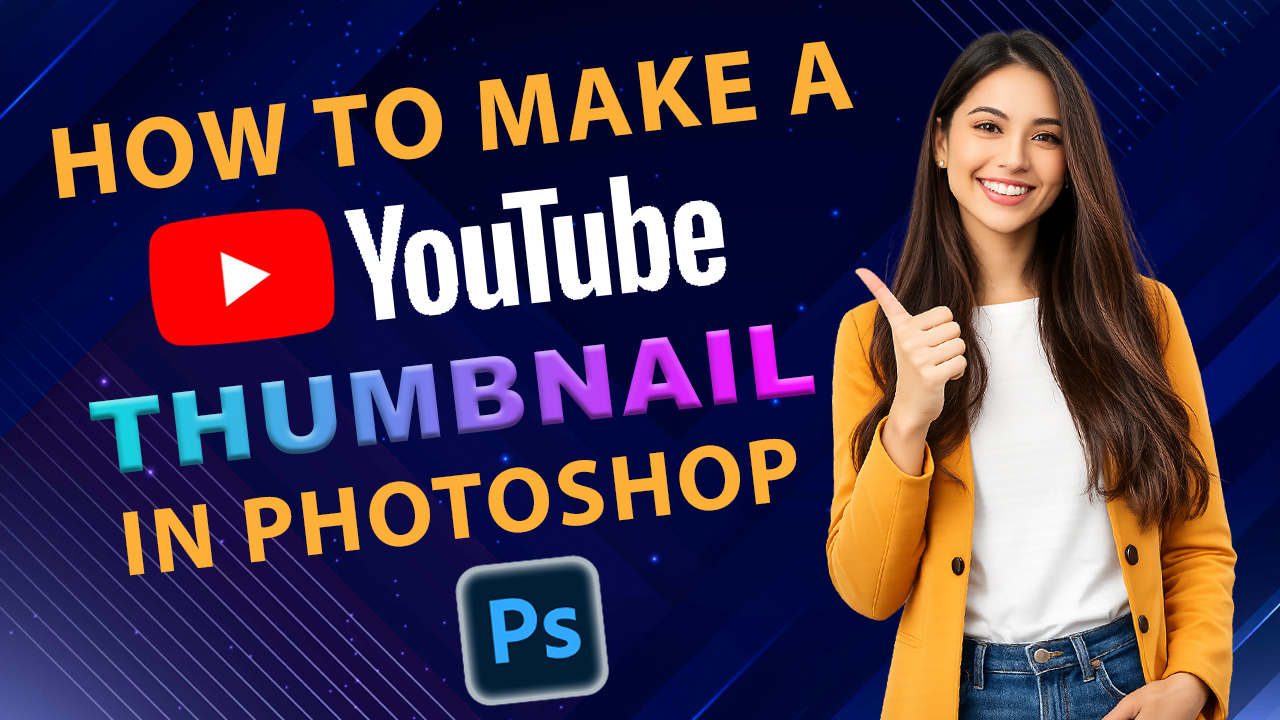
Today we will learn how to create a YouTube thumbnail in Photoshop. Even if you have only basic knowledge of Photoshop, you can create a great-looking thumbnail. While you can create YouTube thumbnails using various applications, Photoshop allows you to make the best ones—giving them a truly professional look—thanks to the wide range of options it offers. If you don’t have Photoshop, you can still create a professional thumbnail using other applications. For this tutorial, however, we will use Photoshop software; using a newer version (such as 19, 20, 23, or the latest releases) is recommended for better performance and superior graphics. So, let’s learn how to do this in three steps.
We will cover this process in three steps. After reading this blog, be sure to watch the accompanying video tutorial; you can find the link at the bottom of the page.
Step (1):-
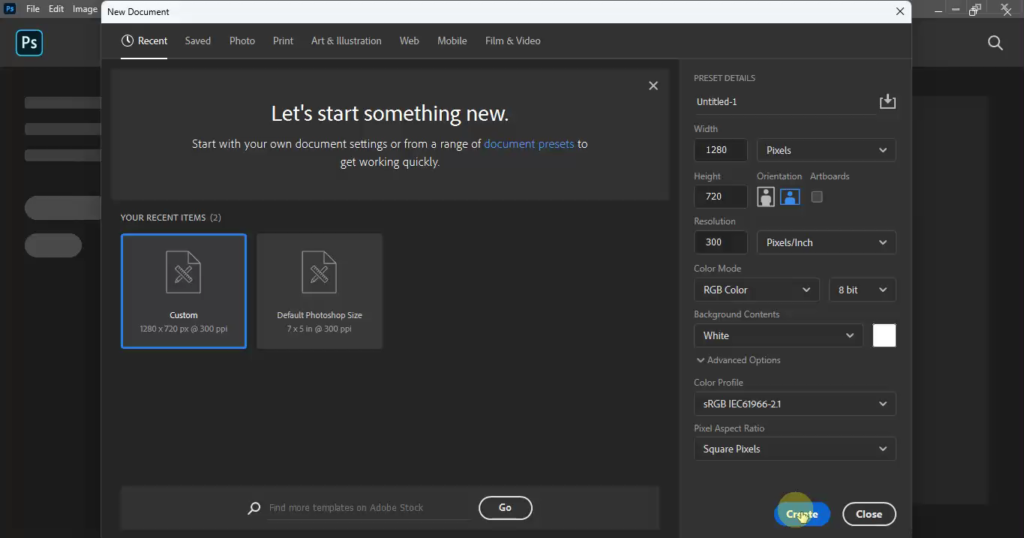
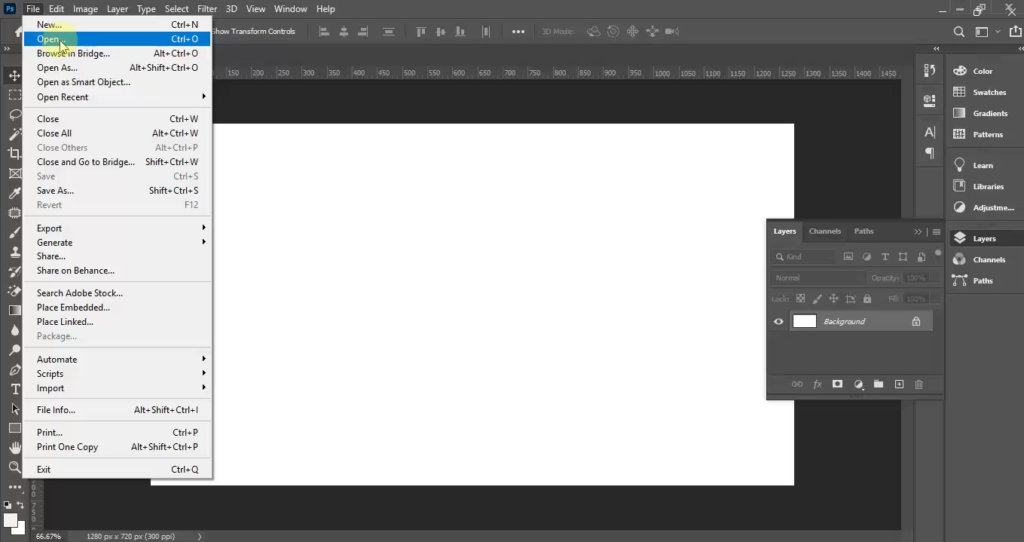
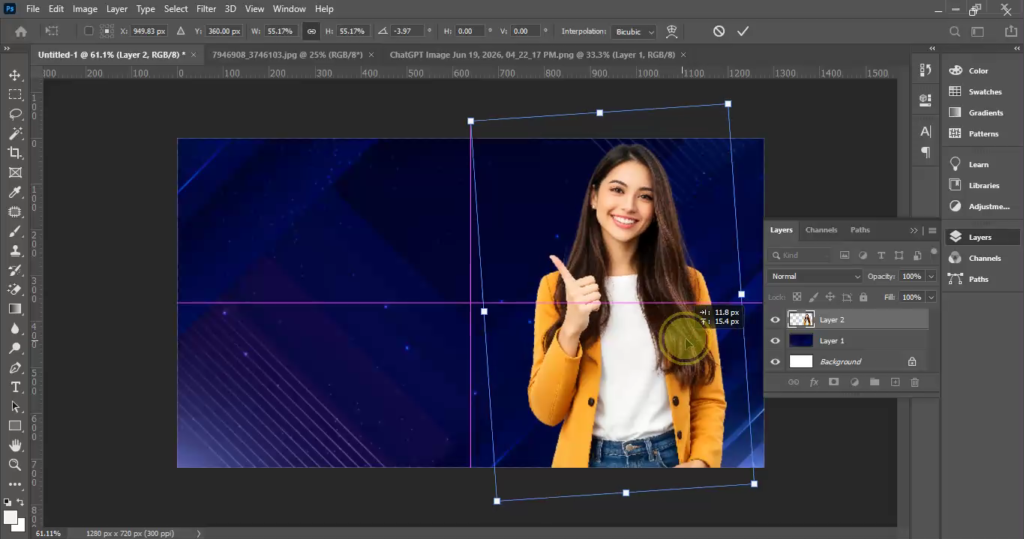
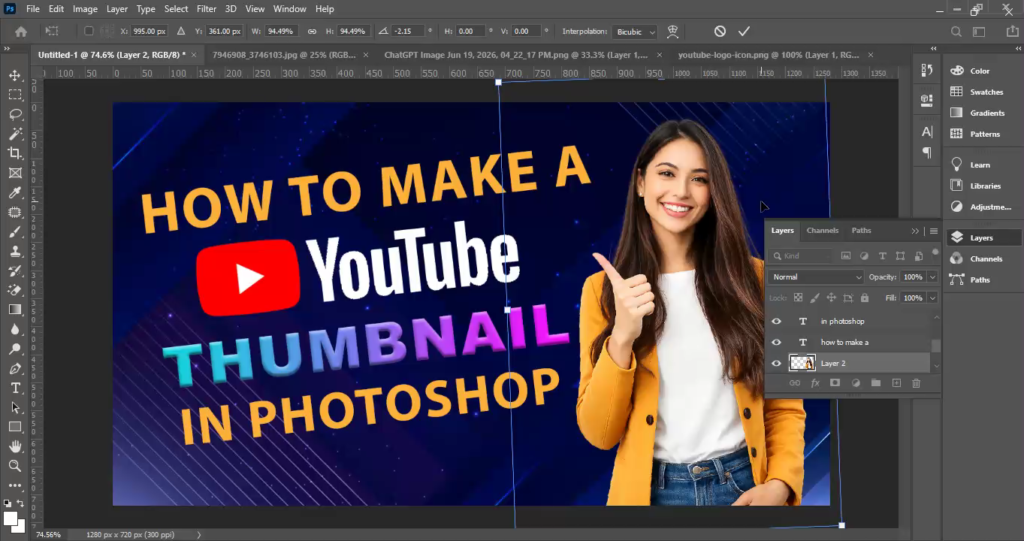
First, open Photoshop and press Ctrl+N to create a new blank document. Set the dimensions to 1280 pixels (width) by 720 pixels (height) with a resolution of 300, then click OK. Next, go to the ‘File’ option in the top menu bar to select a background image; use the Ctrl+T shortcut key to rotate and properly position it as the background.
Step (2):-
Now, select an image that you want to highlight or display on the YouTube thumbnail—this could be anything, such as a person, an animal, the sky, the ground, etc. Import this image via the ‘File’ option in the top menu bar. Use the Ctrl+T shortcut key to adjust and position this image as well.
Step (3):-
Select the Text tool from the toolbar on the left and type your desired heading; use Ctrl+T to adjust its size and position. Select the text layer, go to the ‘Set Foreground Color’ option at the bottom of the toolbar, and choose a color. You can type additional text as needed. You can also add a logo; to apply an ‘Inner Glow’ effect to the logo, right-click on the logo layer, select the ‘FX’ option, and choose ‘Inner Glow’. Alternatively, you can insert other images. Finally, go to the ‘File’ menu and click ‘Save’ to save your work.
In Hindi:-
आज हम सीखेंगे कि Photoshop में YouTube थंबनेल कैसे बनाया जाए। भले ही आपको Photoshop की सिर्फ़ बेसिक जानकारी हो, फिर भी आप एक शानदार दिखने वाला थंबनेल बना सकते हैं। वैसे तो YouTube थंबनेल बनाने के लिए कई ऐप्स मौजूद हैं, लेकिन Photoshop में मिलने वाले ढेरों ऑप्शन्स की वजह से आप सबसे अच्छे और एकदम प्रोफेशनल दिखने वाले थंबनेल बना सकते हैं। अगर आपके पास Photoshop नहीं है, तो भी आप दूसरे ऐप्स का इस्तेमाल करके प्रोफेशनल थंबनेल बना सकते हैं। हालाँकि, इस ट्यूटोरियल के लिए हम Photoshop सॉफ़्टवेयर का इस्तेमाल करेंगे; बेहतर परफ़ॉर्मेंस और शानदार ग्राफ़िक्स के लिए इसके नए वर्शन (जैसे 19, 20, 23 या लेटेस्ट रिलीज़) का इस्तेमाल करने की सलाह दी जाती है। तो आइए, तीन स्टेप्स में इसे करना सीखते हैं।
स्टेप (1):-
सबसे पहले, Photoshop खोलें और नया खाली डॉक्यूमेंट बनाने के लिए Ctrl+N दबाएँ। डाइमेंशन को 1280 पिक्सल (चौड़ाई) और 720 पिक्सल (ऊँचाई) पर सेट करें और रिज़ॉल्यूशन 300 रखें, फिर OK पर क्लिक करें। इसके बाद, बैकग्राउंड इमेज चुनने के लिए टॉप मेनू बार में ‘File’ ऑप्शन पर जाएँ; इसे बैकग्राउंड के तौर पर सही जगह पर लगाने और घुमाने के लिए Ctrl+T शॉर्टकट की का इस्तेमाल करें।
स्टेप (2):-
अब, वह इमेज चुनें जिसे आप YouTube थंबनेल पर दिखाना या हाईलाइट करना चाहते हैं—यह कुछ भी हो सकता है, जैसे कोई व्यक्ति, जानवर, आसमान, ज़मीन, आदि। टॉप मेनू बार में ‘File’ ऑप्शन के ज़रिए इस इमेज को इम्पोर्ट करें। इस इमेज को भी एडजस्ट करने और सही जगह पर लगाने के लिए Ctrl+T शॉर्टकट की का इस्तेमाल करें।
स्टेप (3):-
बाईं ओर मौजूद टूलबार से Text टूल चुनें और अपनी पसंद की हेडिंग टाइप करें; इसके साइज़ और जगह को एडजस्ट करने के लिए Ctrl+T का इस्तेमाल करें। टेक्स्ट लेयर चुनें, टूलबार के नीचे ‘Set Foreground Color’ ऑप्शन पर जाएँ और कोई रंग चुनें। ज़रूरत पड़ने पर आप और टेक्स्ट भी टाइप कर सकते हैं। आप लोगो भी जोड़ सकते हैं; लोगो पर ‘Inner Glow’ इफ़ेक्ट लगाने के लिए, लोगो लेयर पर राइट-क्लिक करें, ‘FX’ ऑप्शन चुनें और ‘Inner Glow’ चुनें। इसके अलावा, आप दूसरी इमेज भी डाल सकते हैं। आखिर में, ‘File’ मेनू पर जाएँ और अपना काम सेव करने के लिए ‘Save’ पर क्लिक करें।
Video Tutorial:-https://youtu.be/A_80904NV3I