
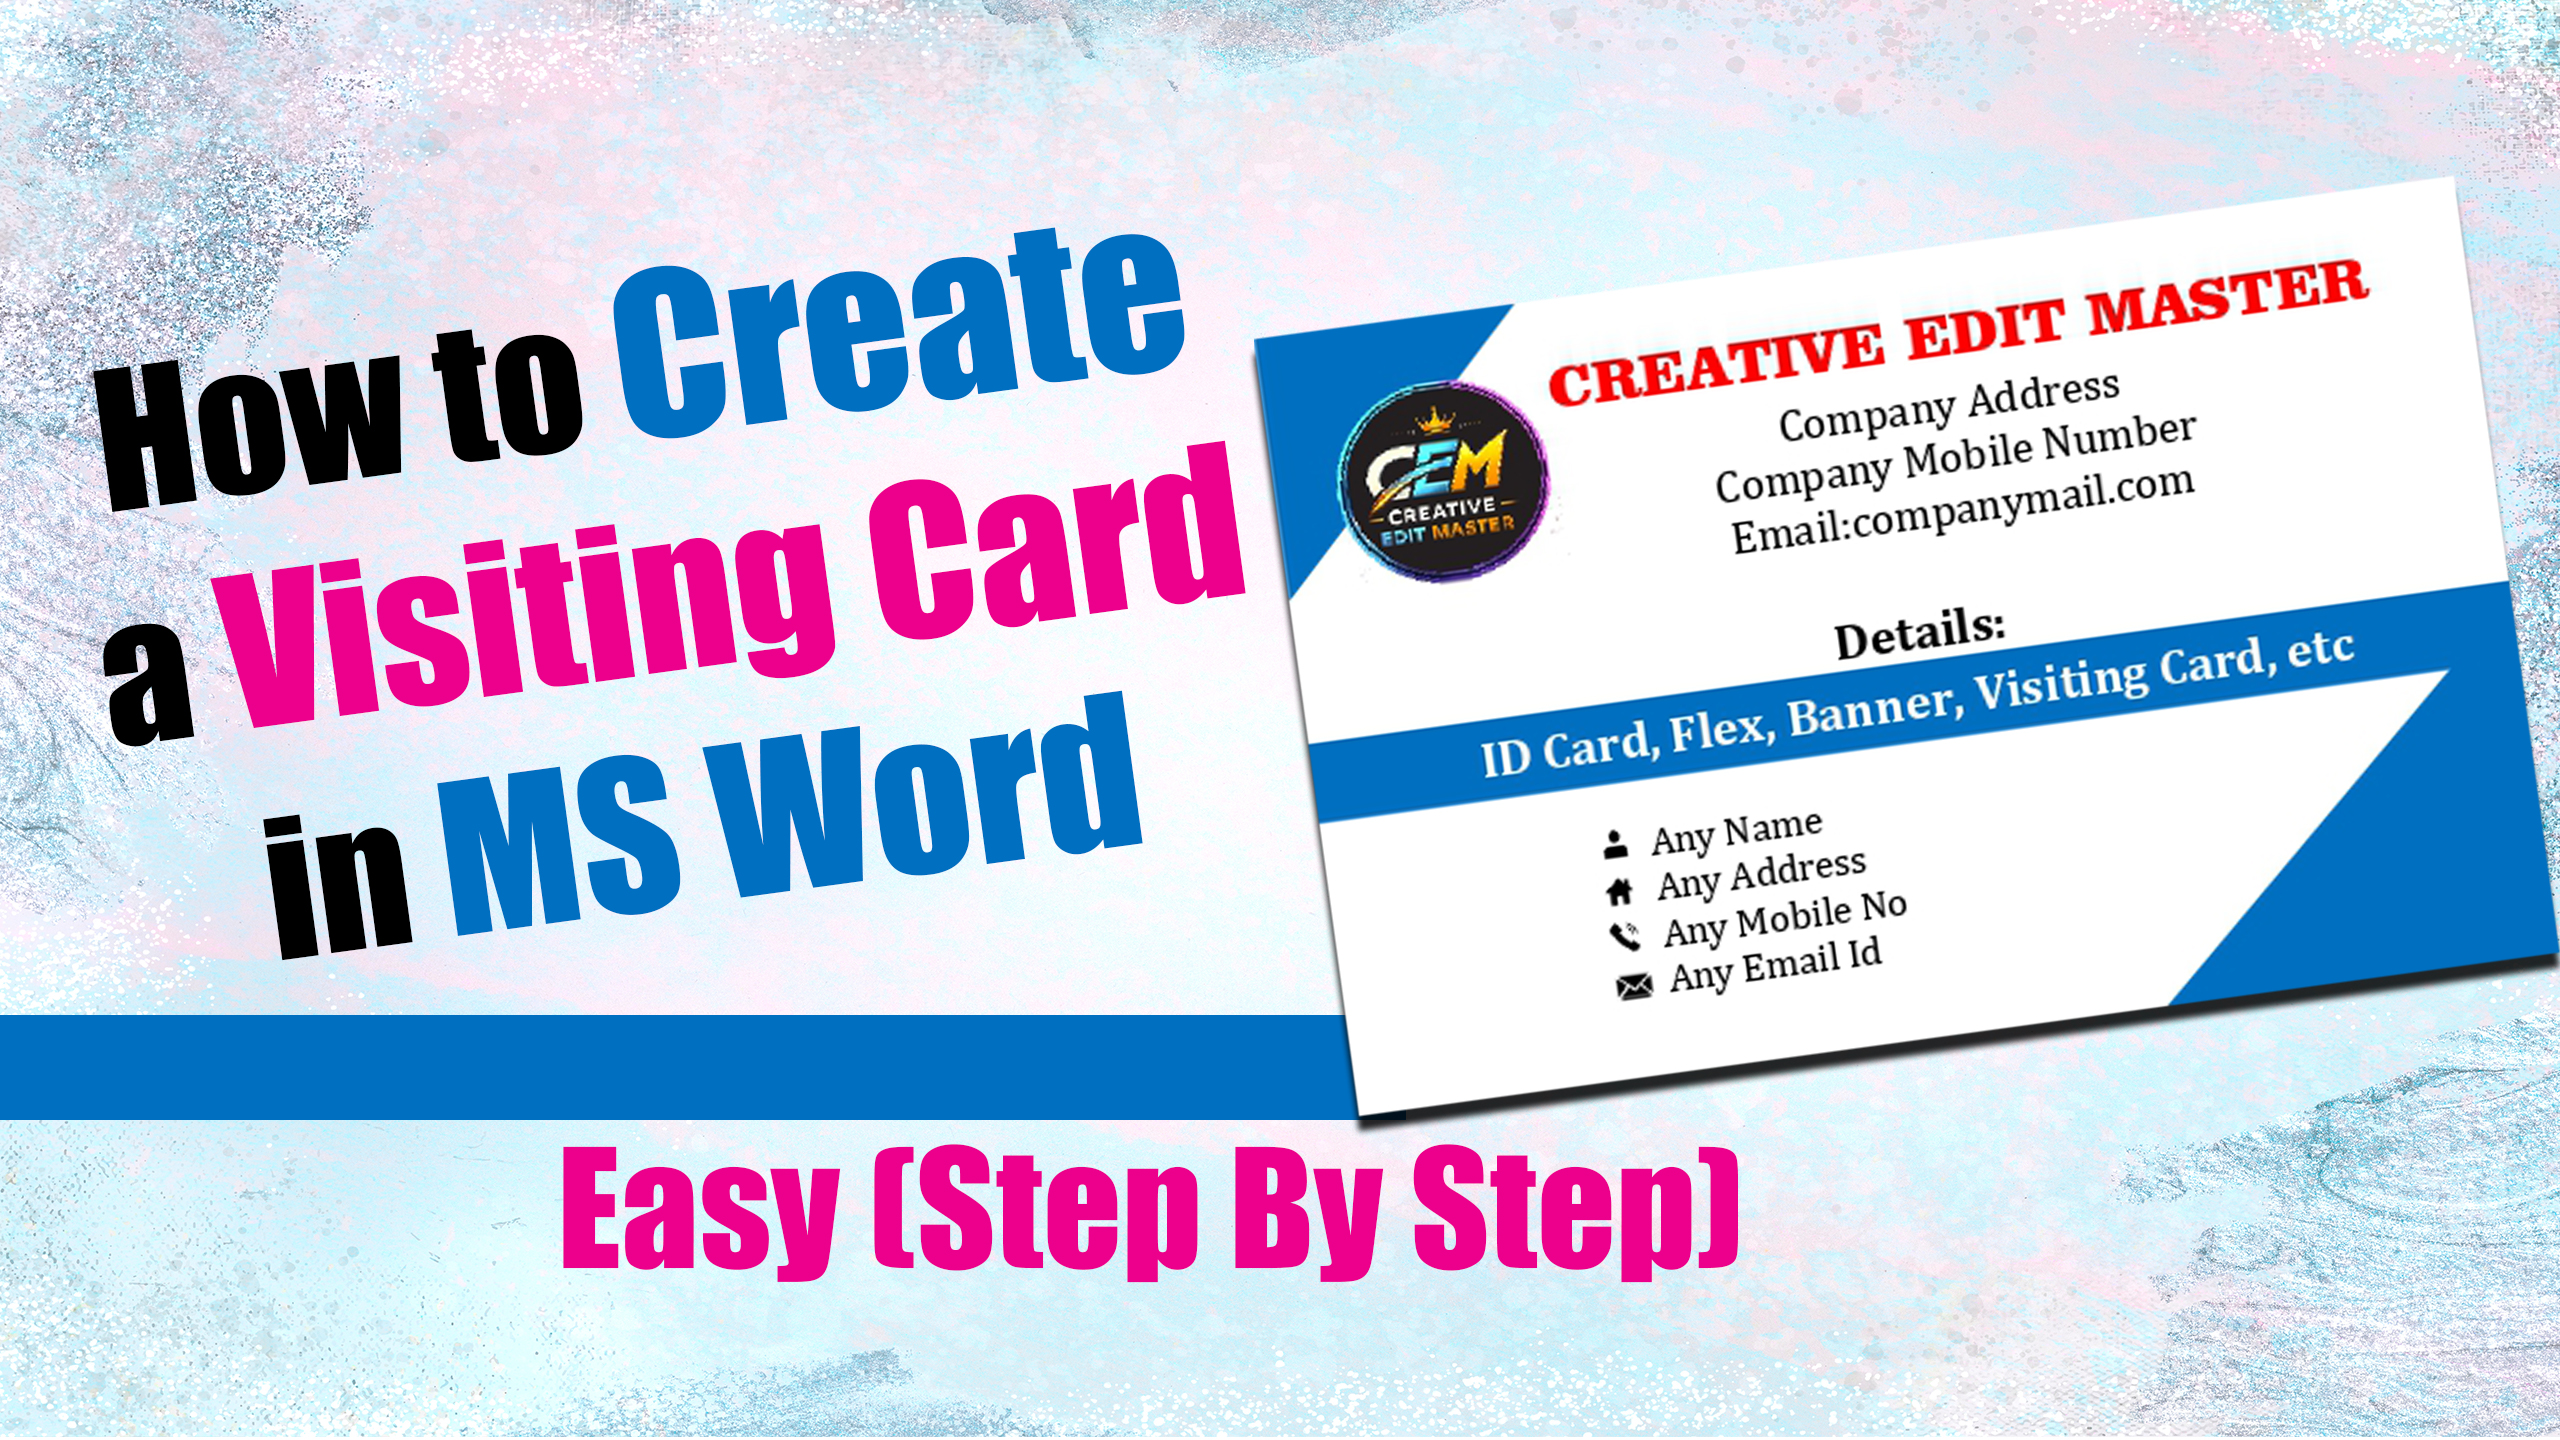
How to create a visiting card in MS Word. While there are many software options and online tools available for creating visiting cards—and they are often designed using CorelDRAW or Photoshop—today we will learn how to make one in MS Word. Just like in other software, MS Word allows for extensive customization, such as creating shapes and curved designs, inserting images, applying gradient colors, and much more. You can create various other designs in MS Word as well, such as resumes, bio-data, cover pages, flex banners, school or staff ID cards, brochures, and invitation cards, all with great ease and precision. We will learn the process in such a way that it feels very simple. We will be using the MS Word software for this; you can use any version, though newer versions (like 2013, 2014, 2015, or the latest releases) offer more options.
We will cover this process in five steps. After reading this blog, be sure to watch the accompanying video tutorial; you can find the link to the video at the bottom of this page.
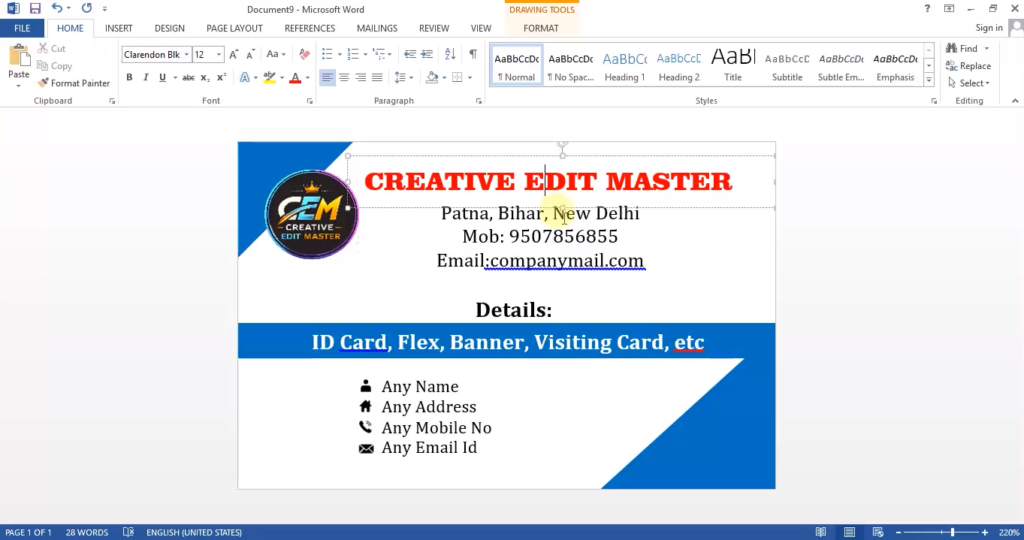
Step (1):-
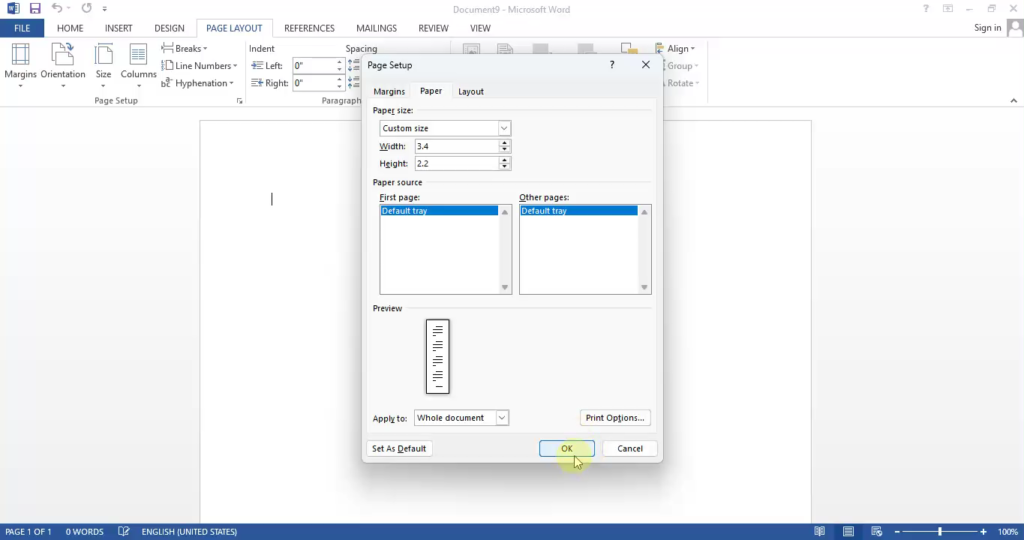
Open MS Word and insert a new page by pressing Ctrl+N on your keyboard. Go to the ‘Page Layout’ option in the top menu bar, click on ‘Size’, and then select ‘More Paper Sizes’. Enter your desired visiting card dimensions; for instance, I am using 3.4 x 2.2 inches, which is a standard size for a wide card.
Step (2):-
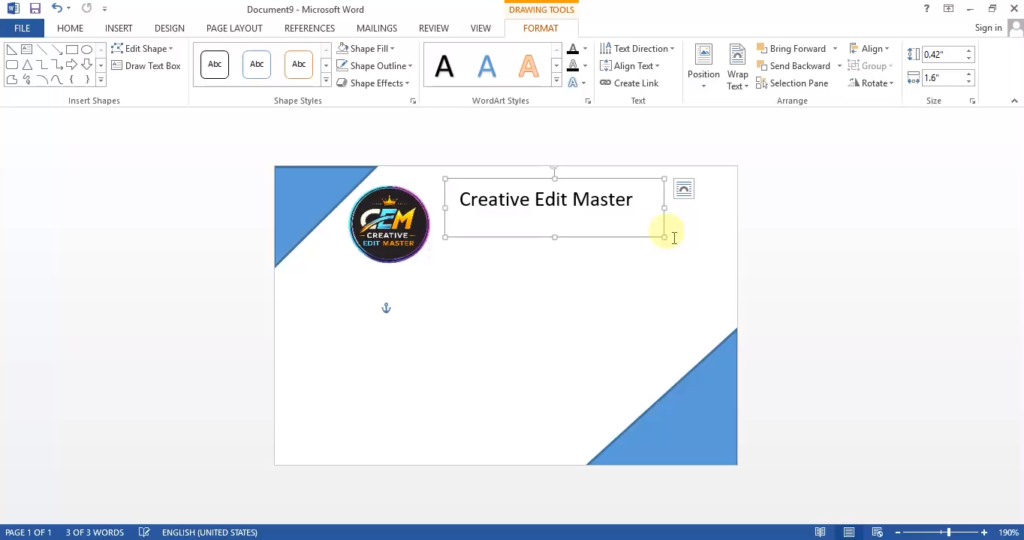
Go to the ‘Insert’ option in the top menu bar, select ‘Shapes’, choose a triangle shape, and adjust it to your liking. Next, go to the ‘Insert’ option again, click on ‘Picture’, select a logo, and adjust it as needed.
Step (3):-
After inserting the page, creating the shape, and placing the logo on the visiting card, it is time to add the heading. To do this, go to the ‘Insert’ option in the top menu bar and click on ‘Text Box’ (located on the right side). A box will appear; remove any pre-existing text inside it, and set the shape fill and shape outline to ‘No Fill’ and ‘No Outline’ using the options in the top menu bar. Now, type the name of the company or school you wish to display as the heading.
Step (4):-
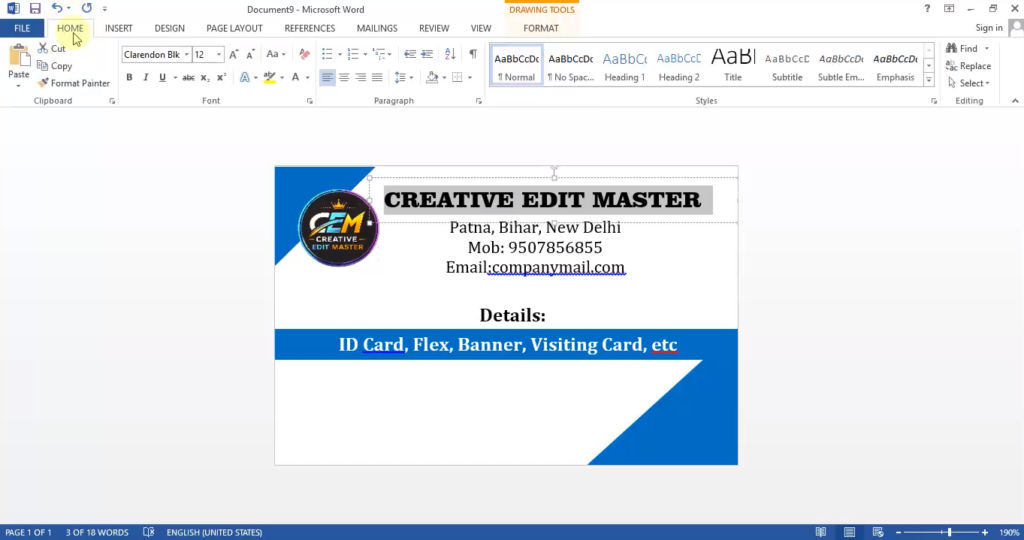
After typing the heading, enter the company or school’s address, phone number, and email or website. Next, list the facilities provided by the company or school and arrange this information neatly using shapes or an attractive font.
Step (5):-
Now, type the name, address, phone number, and email of the company or school owner. Instead of simply listing these in a column, it would look better to download icons for the name, address, phone number, and email from the internet and use them alongside the details. Your visiting card is now ready.
Note:- You can find options to change the text font size, color, or style, as well as options to insert shapes, in the top menu bar.
In Hindi:-
MS Word में विज़िटिंग कार्ड कैसे बनाया जाता है। वैसे तो विज़िटिंग कार्ड बनाने के लिए कई सॉफ्टवेयर और ऑनलाइन टूल्स उपलब्ध हैं—और अक्सर इन्हें CorelDRAW या Photoshop का इस्तेमाल करके डिज़ाइन किया जाता है—लेकिन आज हम MS Word में इसे बनाना सीखेंगे। दूसरे सॉफ्टवेयर की तरह ही, MS Word में भी बहुत सारे कस्टमाइज़ेशन किए जा सकते हैं, जैसे शेप्स और कर्व्ड डिज़ाइन बनाना, इमेज डालना, ग्रेडिएंट कलर लगाना, और भी बहुत कुछ। आप MS Word में कई तरह के दूसरे डिज़ाइन भी बना सकते हैं, जैसे रिज़्यूमे, बायो-डेटा, कवर पेज, फ्लेक्स बैनर, स्कूल या स्टाफ़ ID कार्ड, ब्रोशर और इनविटेशन कार्ड; ये सब बहुत आसानी और सटीकता से किया जा सकता है। हम इस प्रोसेस को ऐसे सीखेंगे कि यह बहुत आसान लगे। इसके लिए हम MS Word सॉफ्टवेयर का इस्तेमाल करेंगे; आप कोई भी वर्शन इस्तेमाल कर सकते हैं, हालांकि नए वर्शन (जैसे 2013, 2014, 2015 या लेटेस्ट रिलीज़) में ज़्यादा ऑप्शन मिलते हैं।
हम इस प्रोसेस को पाँच स्टेप्स में पूरा करेंगे। इस ब्लॉग को पढ़ने के बाद, साथ में दिया गया वीडियो ट्यूटोरियल ज़रूर देखें; वीडियो का लिंक आपको इस पेज के नीचे मिल जाएगा।
स्टेप (1):-
MS Word खोलें और अपने कीबोर्ड पर Ctrl+N दबाकर एक नया पेज लें। ऊपर मेनू बार में ‘Page Layout’ ऑप्शन पर जाएँ, ‘Size’ पर क्लिक करें और फिर ‘More Paper Sizes’ चुनें। अपने विज़िटिंग कार्ड का मनचाहा साइज़ डालें; उदाहरण के लिए, मैं 3.4 x 2.2 इंच का इस्तेमाल कर रहा हूँ, जो एक चौड़े कार्ड के लिए स्टैंडर्ड साइज़ है।
स्टेप (2):-
ऊपर मेनू बार में ‘Insert’ ऑप्शन पर जाएँ, ‘Shapes’ चुनें, एक ट्राएंगल (त्रिभुज) शेप चुनें और उसे अपनी पसंद के अनुसार एडजस्ट करें। इसके बाद, फिर से ‘Insert’ ऑप्शन पर जाएँ, ‘Picture’ पर क्लिक करें, एक लोगो चुनें और उसे ज़रूरत के अनुसार एडजस्ट करें।
स्टेप (3):-
पेज लेने, शेप बनाने और विज़िटिंग कार्ड पर लोगो लगाने के बाद, अब हेडिंग जोड़ने का समय है। ऐसा करने के लिए, ऊपर मेनू बार में ‘Insert’ ऑप्शन पर जाएँ और ‘Text Box’ (जो दाईं ओर होता है) पर क्लिक करें। एक बॉक्स दिखाई देगा; इसके अंदर पहले से मौजूद टेक्स्ट को हटा दें और टॉप मेन्यू बार में दिए गए ऑप्शन का इस्तेमाल करके शेप फ़िल और शेप आउटलाइन को ‘No Fill’ और ‘No Outline’ पर सेट करें। अब, उस कंपनी या स्कूल का नाम टाइप करें जिसे आप हेडिंग के तौर पर दिखाना चाहते हैं।
स्टेप (4):-
हेडिंग टाइप करने के बाद, कंपनी या स्कूल का पता, फ़ोन नंबर और ईमेल या वेबसाइट डालें। इसके बाद, कंपनी या स्कूल द्वारा दी जाने वाली सुविधाओं की लिस्ट बनाएं और इस जानकारी को शेप या आकर्षक फ़ॉन्ट का इस्तेमाल करके अच्छी तरह से व्यवस्थित करें।
स्टेप (5):-
अब, कंपनी या स्कूल के मालिक का नाम, पता, फ़ोन नंबर और ईमेल टाइप करें। इन्हें बस एक कॉलम में लिस्ट करने के बजाय, इंटरनेट से नाम, पता, फ़ोन नंबर और ईमेल के लिए आइकन डाउनलोड करके उन्हें जानकारी के साथ इस्तेमाल करना बेहतर लगेगा। आपका विज़िटिंग कार्ड अब तैयार है।
नोट:- आप टॉप मेन्यू बार में टेक्स्ट फ़ॉन्ट साइज़, रंग या स्टाइल बदलने के साथ-साथ शेप डालने के ऑप्शन भी पा सकते हैं।
Video Tutorial:– https://youtu.be/XaheNiiZjdc